
Quick Jump To Guide:
What is Virtual Install?
In the ArtCloud Marketplace
On ArtCloud Websites (Legacy)
On ArtCloud Websites (Sitebuilder 3.0)
Why do I not see the Inventory Controls box highlighted? (Sitebuilder 3.0)
What is Virtual Install?
Virtual Install allows potential buyers to get an idea of what a piece may look like in their home. There are two places that the Virtual Install feature can be used: in the Marketplace and on your ArtCloud Website.
Follow along with this article to learn how to enable Virtual Install on the pieces in your ArtCloud Marketplace profile and your ArtCloud website:
In the ArtCloud Marketplace
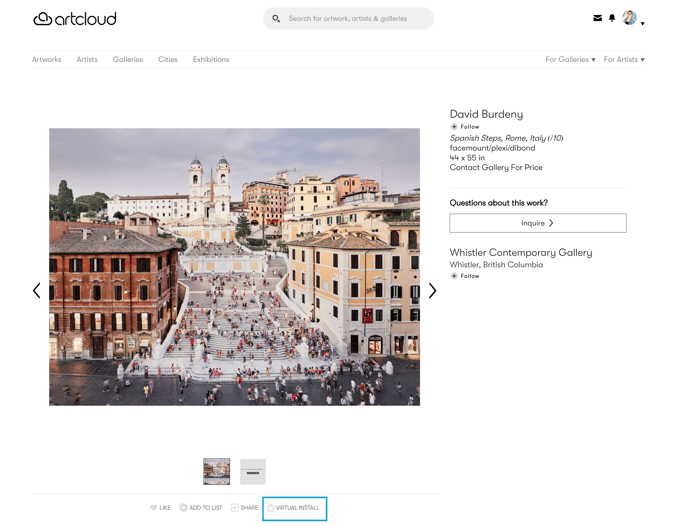
Thankfully, the ability for potential-buyers to use Virtual Install in the marketplace is enabled by default! To use Virtual Install in the Marketplace, navigate to an art piece, and click the Virtual Install button below the piece's featured image:
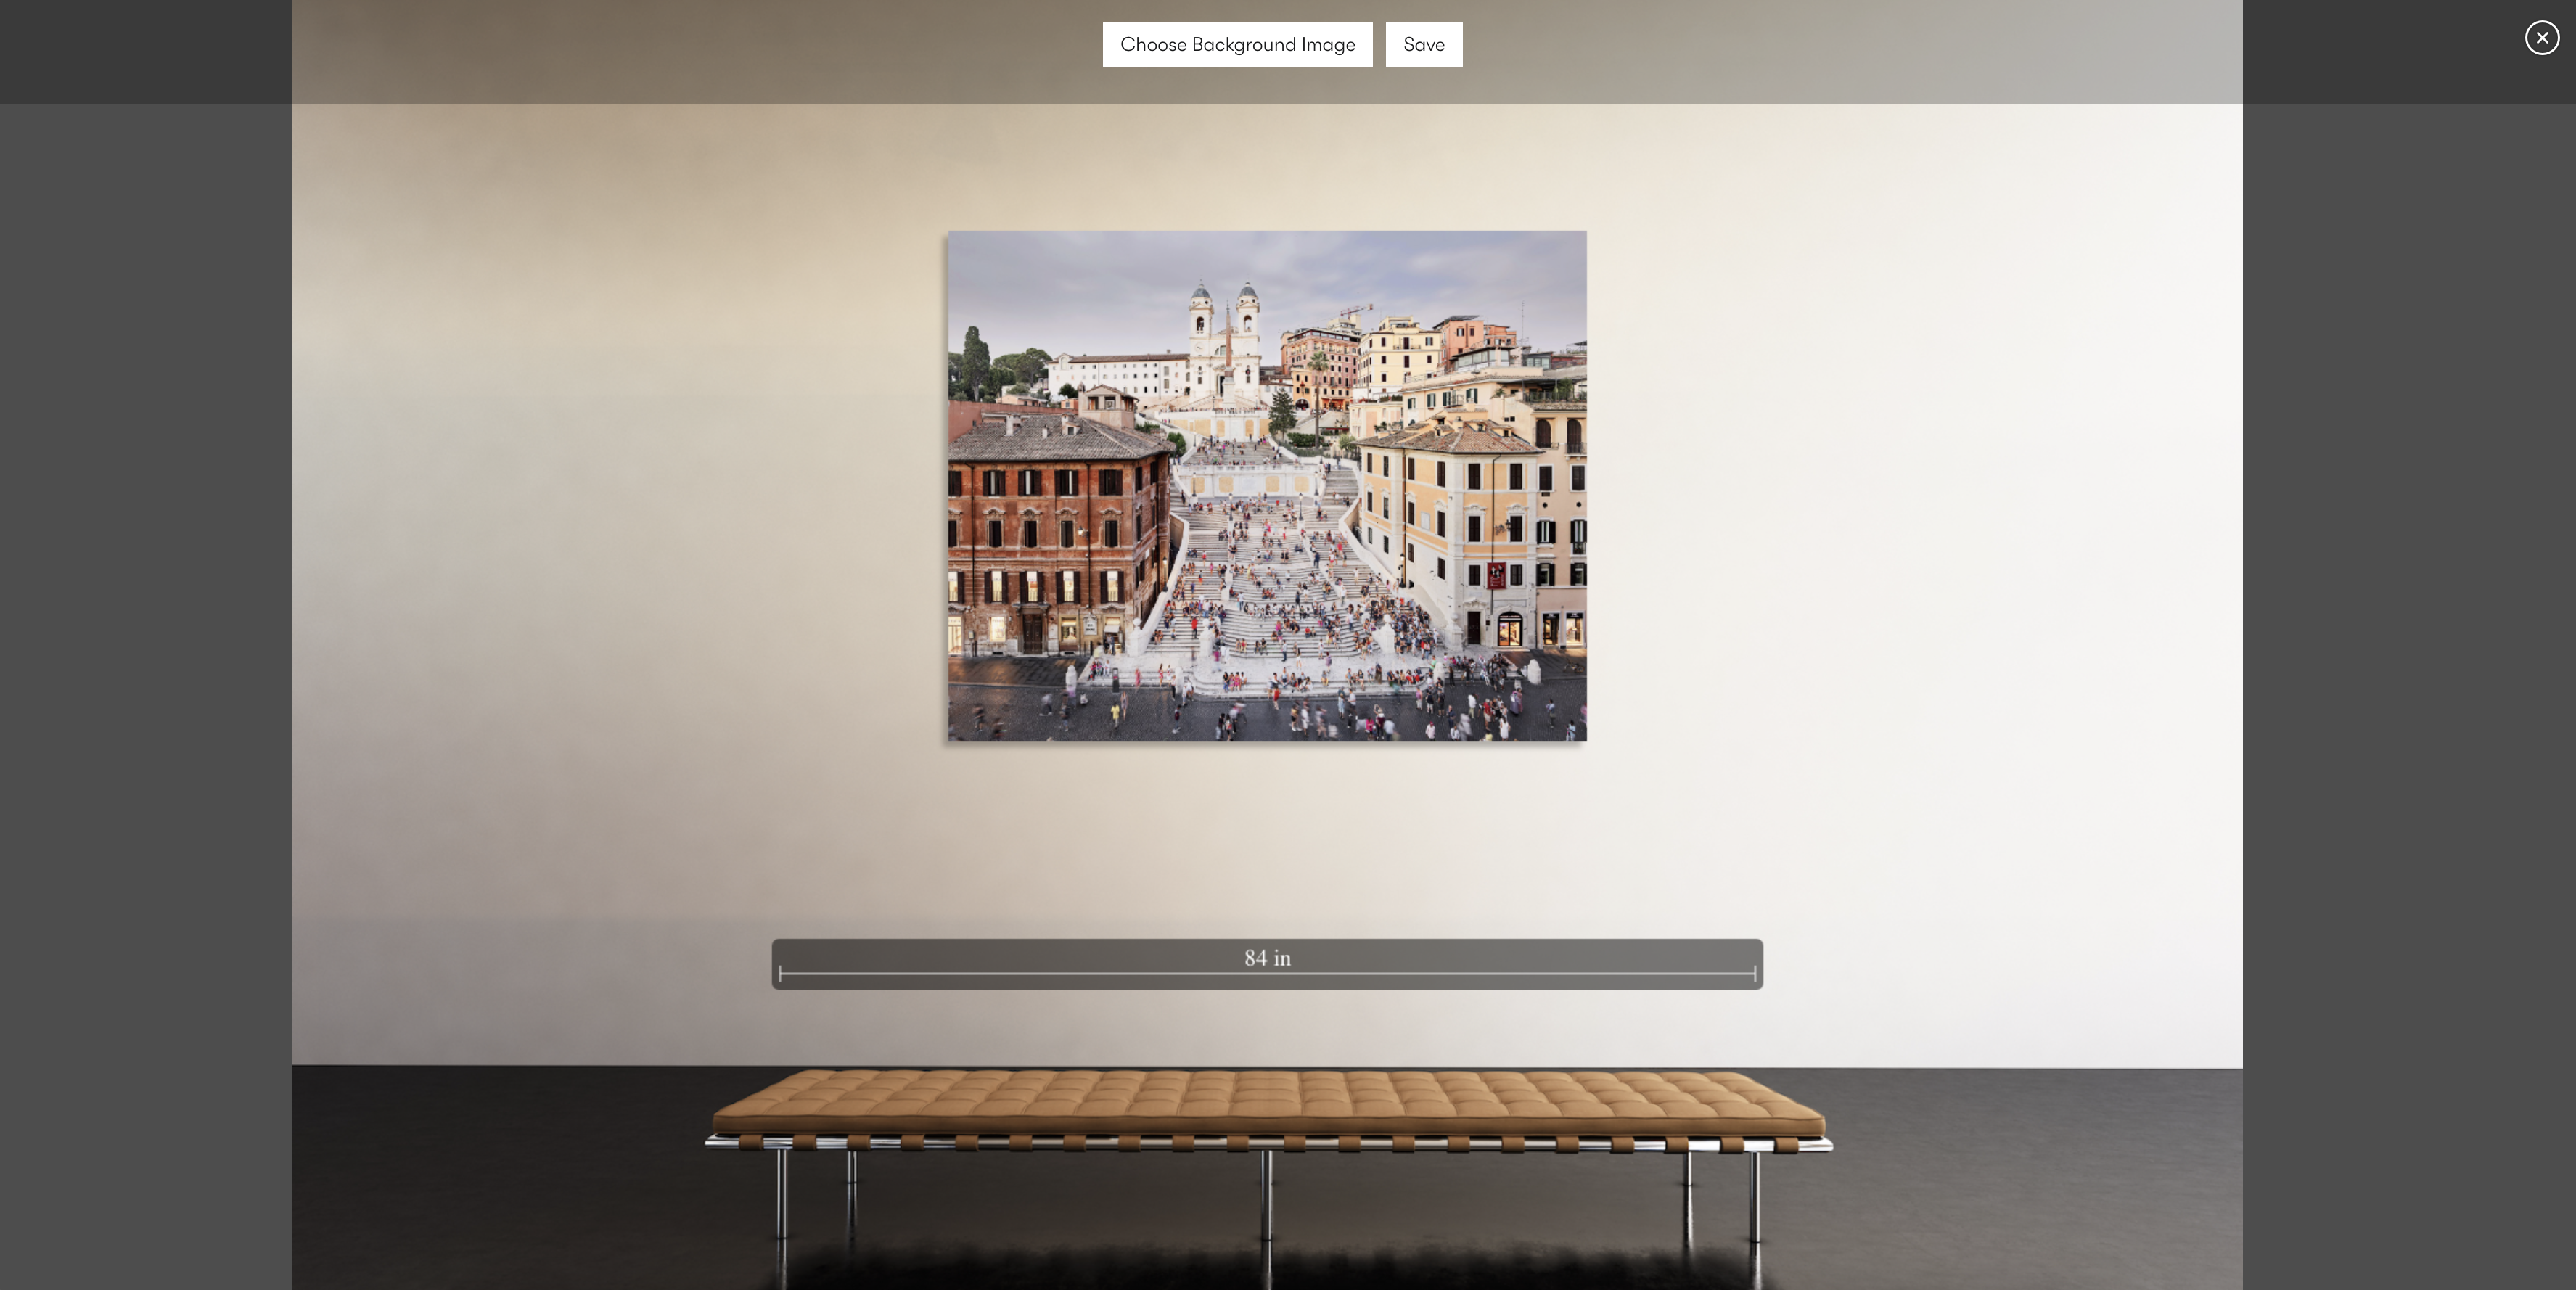
Doing so will open the Virtual Installation viewer, where a user will see the artwork with a measuring tool on a default gallery wall view. Users can "Choose Background Image" to upload their own background view for the art piece to be seen, simulating it being in a user's home!
On ArtCloud Websites (Legacy)
Please note: this is a Pro+ feature for both Artist and Gallery accounts. To see the subscription tiers and what each tier offers, please visit our Features pages: Artists & Gallery.
If you'd like to learn about upgrading your account, please feel free to reach out to Support!
To enable Virtual Install in an ArtCloud website, you'll first need to navigate to the Website Builder side of ArtCloud and then into Page Templates. Next, click on the Inventory Detail page template.
-gif.gif)
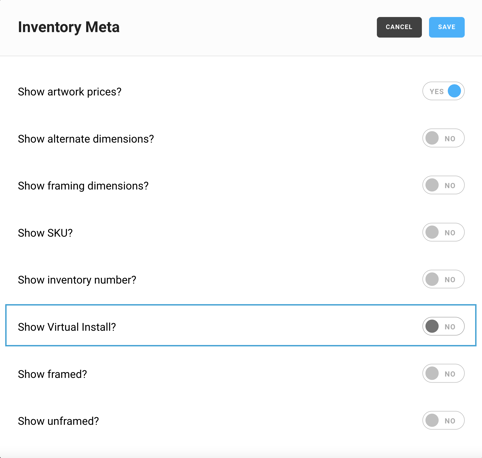
Once there, hover over the example inventory item (the inventory detail block) and click on the blue cog wheel that appears in the top-right corner of the widget. This will open an Inventory Meta popup.
In this popup, you’ll see a few different options. Click on the Show Virtual Install toggle to enable potential buyers to use the Virtual Install feature. Be sure to hit the large blue SAVE button at the top-right of the screen.
On ArtCloud Websites (Sitebuilder 3.0)
Please note: this is a Pro+ feature for both Artist and Gallery accounts. To see the subscription tiers and what each tier offers, please visit our Features pages: Artists & Gallery.
If you'd like to learn about upgrading your account, please feel free to reach out to Support!
In Sitebuilder 3.0, we've added the quick capability to add a Virtual Install link on all of your works on the site.
You'll want to navigate to your Inventory Detail Template in Sitebuilder 3.0:-gif.gif)
Once editing your Inventory Detail Template, you'll want to find the Inventory Controls on the Content tab of the template. You can then drag and drop this block onto your template and toggle on Virtual Install for visitors to use this feature.
-gif.gif)
Why do I not see the Inventory Controls box highlighted? (Sitebuilder 3.0)
Virtual Install is a feature of Website Pro+ subscriptions only. If you do not see the block highlighted for use on the page template, you may not have the proper subscription to use this.
For access clarification or if you're interested in trialing this feature, please reach out to Support for more information.
Once you hit Save on the bottom of your template as well as on the top of your template, you will see this feature available on your works!
NOTE: Your inventory items must be set to display in Page View rather than Modal View for the Virtual Install option to be visible. We have an article that outlines how to change this.