
You can alter what details you want to display on the Inventory details page for clients to see with the Inventory Meta settings block. You can access this by going into your Website Builder, clicking on Page Templates, and editing your Inventory Detail Page Template.
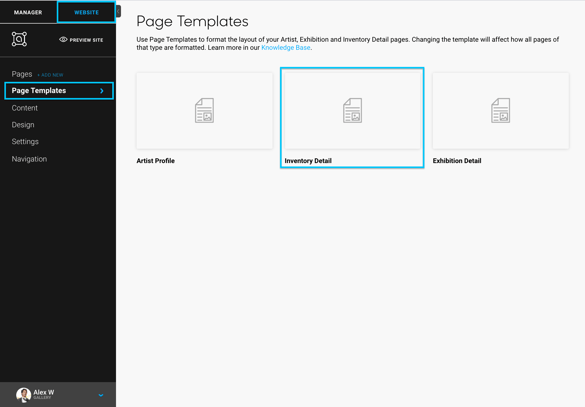
Once you're editing the page template, you can access the Inventory Meta by clicking on the blue gear icon of your Inventory block.
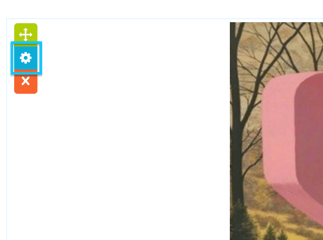
There, it will bring up the Inventory Meta block for you to change the following: show artwork prices, show alternate dimensions, show framing dimensions, show SKU number, show inventory number, and show virtual install.

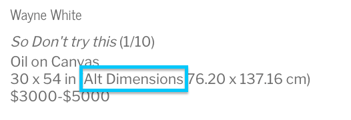
Alternate Dimensions
If you'd like to show alternate dimensions on your pieces, you'll want to make sure you toggle on 'Show alternate dimensions?' Once you toggle this on, you can even include a specific label with this field to display on the site.

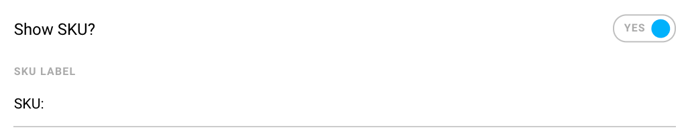
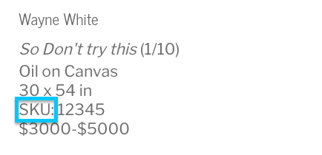
SKU
If you'd like to display your SKU number on your pieces, you can toggle this option on in this Meta block. You can also include a specific label for the SKU number.
Inventory Number
If you'd like to display your inventory number on your pieces, you can toggle this option on in this Meta block. You can also include a specific label for the Inventory Number.
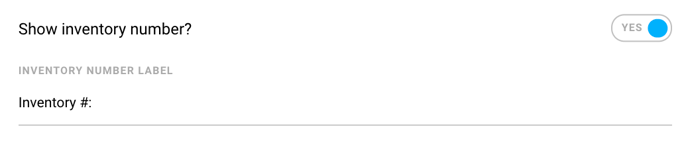
The platform will display the direct input in the Label section. If you want a space after your label, you will need to add a space after your label. For example: you would want to enter Inventory #: , instead of Inventory #:.
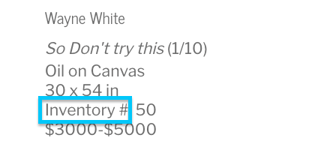
It would display like the following:
With spacing after: Inventory #: 50
Without spacing after : Inventory #:50
Suggested Readings
- Modify the layout of your Inventory Detail pages with Page Templates