Quick Jump To Guide:
General
Opportunities
Artist Management
Inventory
Logistics & POs
Exchange Rates
Transactional Emails
The Configurations tab gives you control over general account settings and tools to customize the ArtCloud platform to fit your needs. Scroll for details about each section of the Configurations tab.
General
Set you core account preferences, like your address, date format, timezone, and currency.
You can also assign a default Inventory Location and Inventory Type so all new Inventory Records start with consistent information. Inventory Location defaults to "Gallery" or "Studio," and Inventory Type defaults to "Artwork."
 Opportunities
Customize the stages in the Sales Opportunity Tracker. You can add new stages or edit existing ones. Adjust the name, likelihood to win, color, and type.
Change to Opportunity Stages apply to all users on the account.
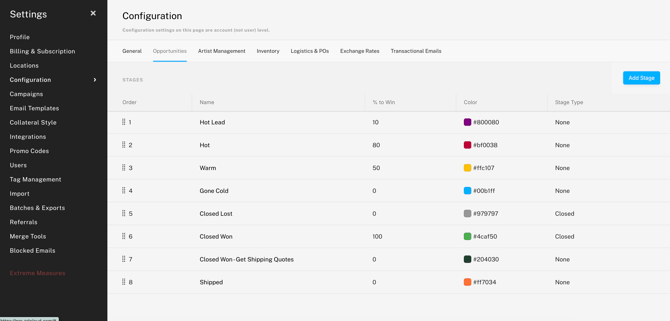
Learn more: How do I configure my Opportunity Stages?
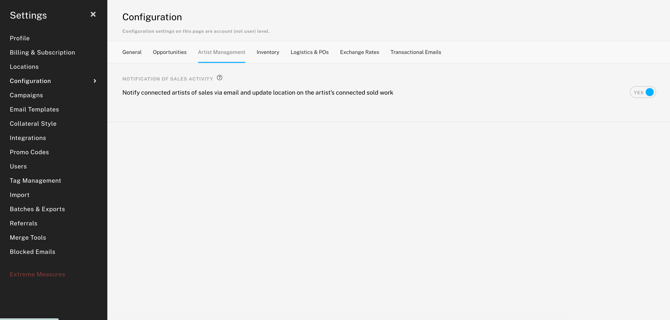
Artist Management
Choose whether to notify your artists of sales activity.
Only connected artists with consigned inventory will receive these notifications. When Inventory consigned through ArtCloud sells and the invoice closes, the connected artist receives an automated notification. In the artist's ArtCloud account, the inventory's location will change to "Sold by [Gallery Name]."
Inventory
Configure the types of inventory available on Inventory Records and control whether new inventory is automatically listed on the ArtCloud Marketplace or your ArtCloud Website.
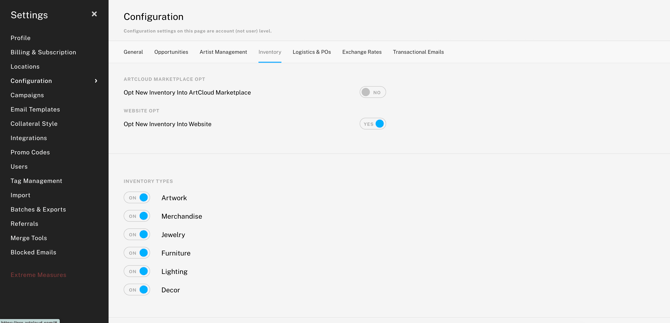
Note: Changes to these controls won't apply to existing inventory, only new inventory going forward.
Logistics & POs
Create and edit Purchase Order stages. You can adjust the order, name, and color of each stage.
Change to Purchase Order stages apply to all users on the account.
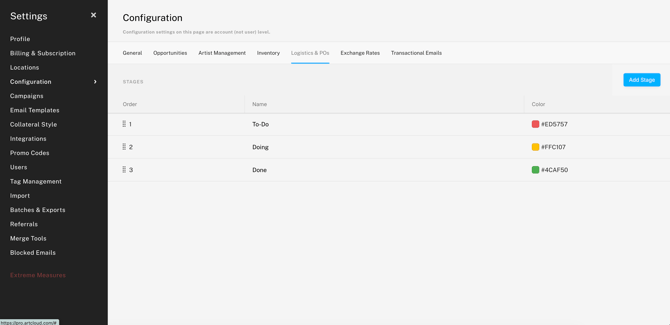
Learn more: Tracking inventory through Logistics & Purchase Orders
Exchange Rates
Add and manage exchange rates to display multiple currencies on your ArtCloud website, invoices, and collateral.
Exchange rates in ArtCloud do not update automatically. You will need to manually adjust them as exchange rates change.
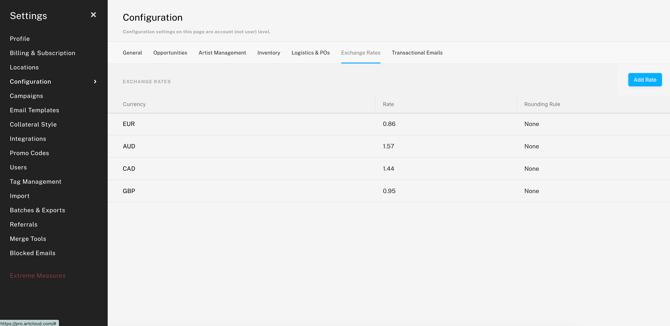
Learn more: Display Prices in Multiple Currencies.
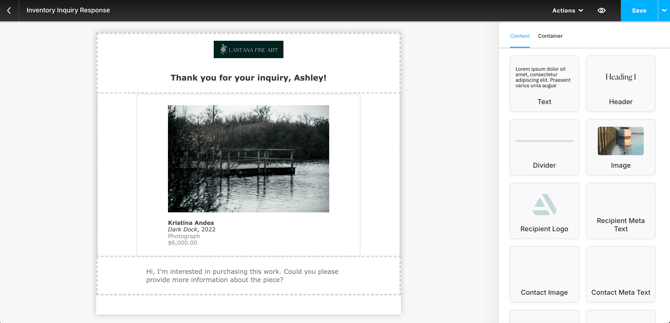
Transactional Emails
Customize the automated emails sent for inquiries, offers, purchases, and subscription confirmations.
When website visitors submit a form on your website, ArtCloud sends a corresponding email based on the submission type. The email comes from your company name as listed in the General section, and you will receive a BCC.
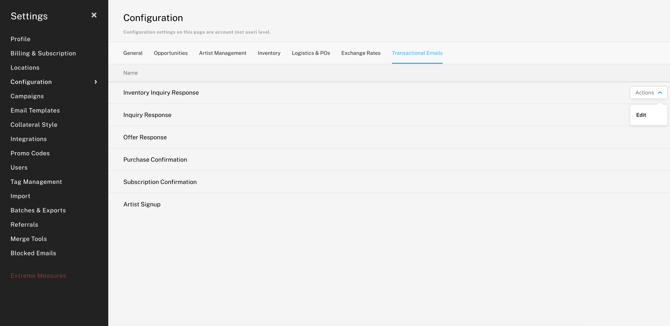
The Transactional Email Builder includes drag-and-drop content blocks and metadata, such as contact and inventory details.