Quick Jump To Guide:
What is the Collateral Builder?
Templates
Design
Default Settings
What is the Collateral Builder
In your Account Settings, use the Collateral Builder to design and customize documents for your Inventory, Artists, and Invoices.These documents include:
• Tearsheets
• Pricelists
• Invoices
• Offers
• Certificates of authenticity
• Artist bios
• Consignments
• Mosaics
• Purchase orders
You can create multiple templates for each collateral type, giving you complete control over how your documents look and function.
In the Collateral Builder, tokens and drag-and-drop blocks function similarly to ArtCloud's Website and Campaign Builders.
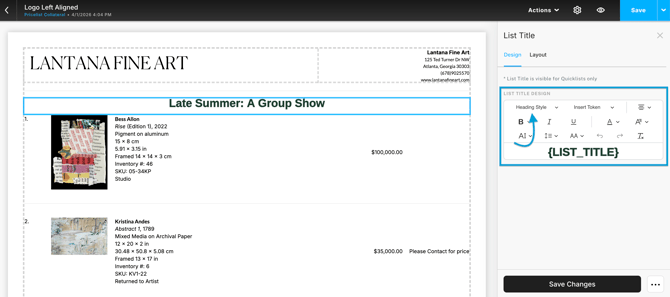
These Tokens display information about inventory, artists, and invoices according to their records. For example, a {TITLE} Token displays an artwork's title according to its Inventory Record. This value updates based on the content in the collateral document.
Read more about the different types of collateral here: What is Collateral in ArtCloud?
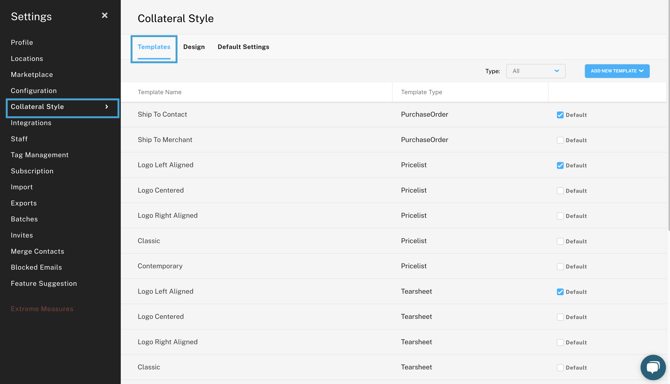
Templates
Head to Account Settings >> Collateral Style to manage the templates.
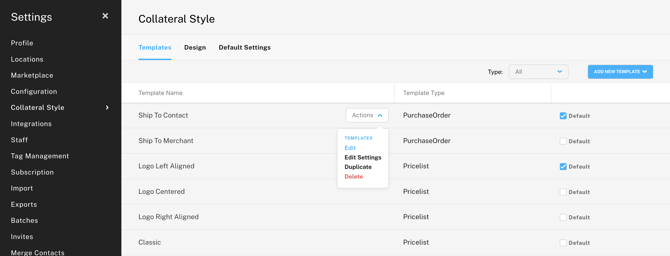
To edit a template, either click the template's name or hover over the name and select "Edit" from the Actions dropdown. The Actions dropdown also includes options to rename, duplicate, or delete the template.
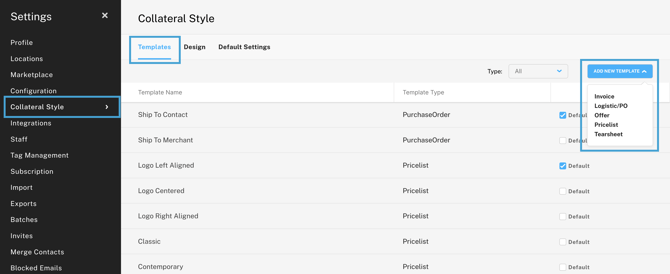
To create a new template, click "Add New Template" and select a template type.
Design
Use the Design tab to set the overall style of your collateral. You can upload your logo, configure fonts, and customize type styles.
To add fonts, click "Configure" next to Available Fonts and choose from the Google Font library. Save the changes.
-gif.gif?width=670&height=378&name=2023-11-03_16-07-42%20(1)-gif.gif)
Next, you can apply these fonts to different Type Styles. Select a style from the Style Guide dropdown and make adjustments in the text editor. There's a preview of all Type Styles on the left.
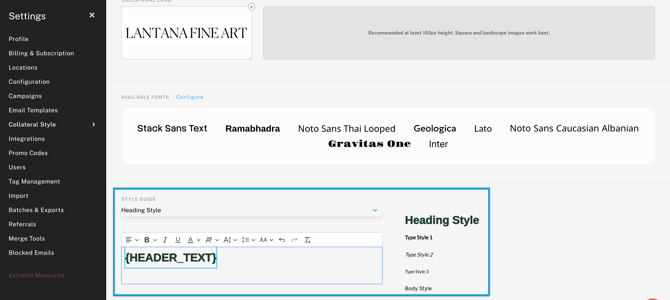
Changes to the type styles affect all collateral templates. When you select a type style within the Collateral Builder, the text will follow the design you set here.
Default Settings
Lastly, use the Default Settings tab to enter default invoice comments, certificate of authenticity text, and return to artist terms. Through Tokens, the text you enter in these fields will automatically populate on the corresponding collateral types.
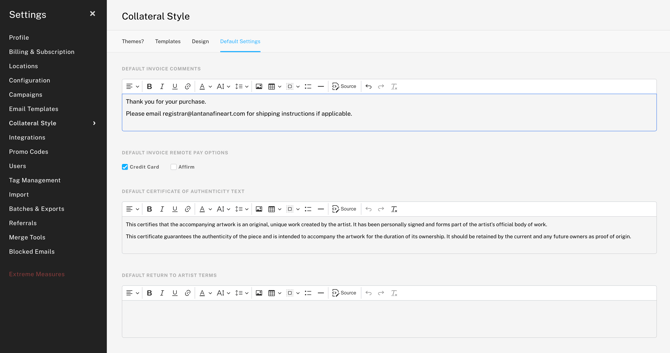
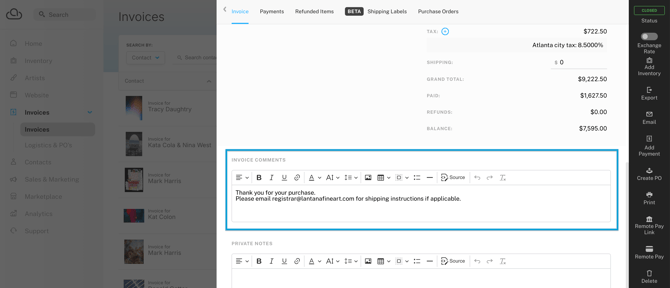
The default invoice comments will also populate in the Invoice Comments section on Invoice Records.
Note: Changes to these text fields will only affect future invoices and collateral. Text changes won't affect existing records and documents.