Quick Jump To Guide
Manage Your Website Navigation
Add and Remove Pages
Reorder Pages
Create Dropdown Pages
Manage Your Website Navigation
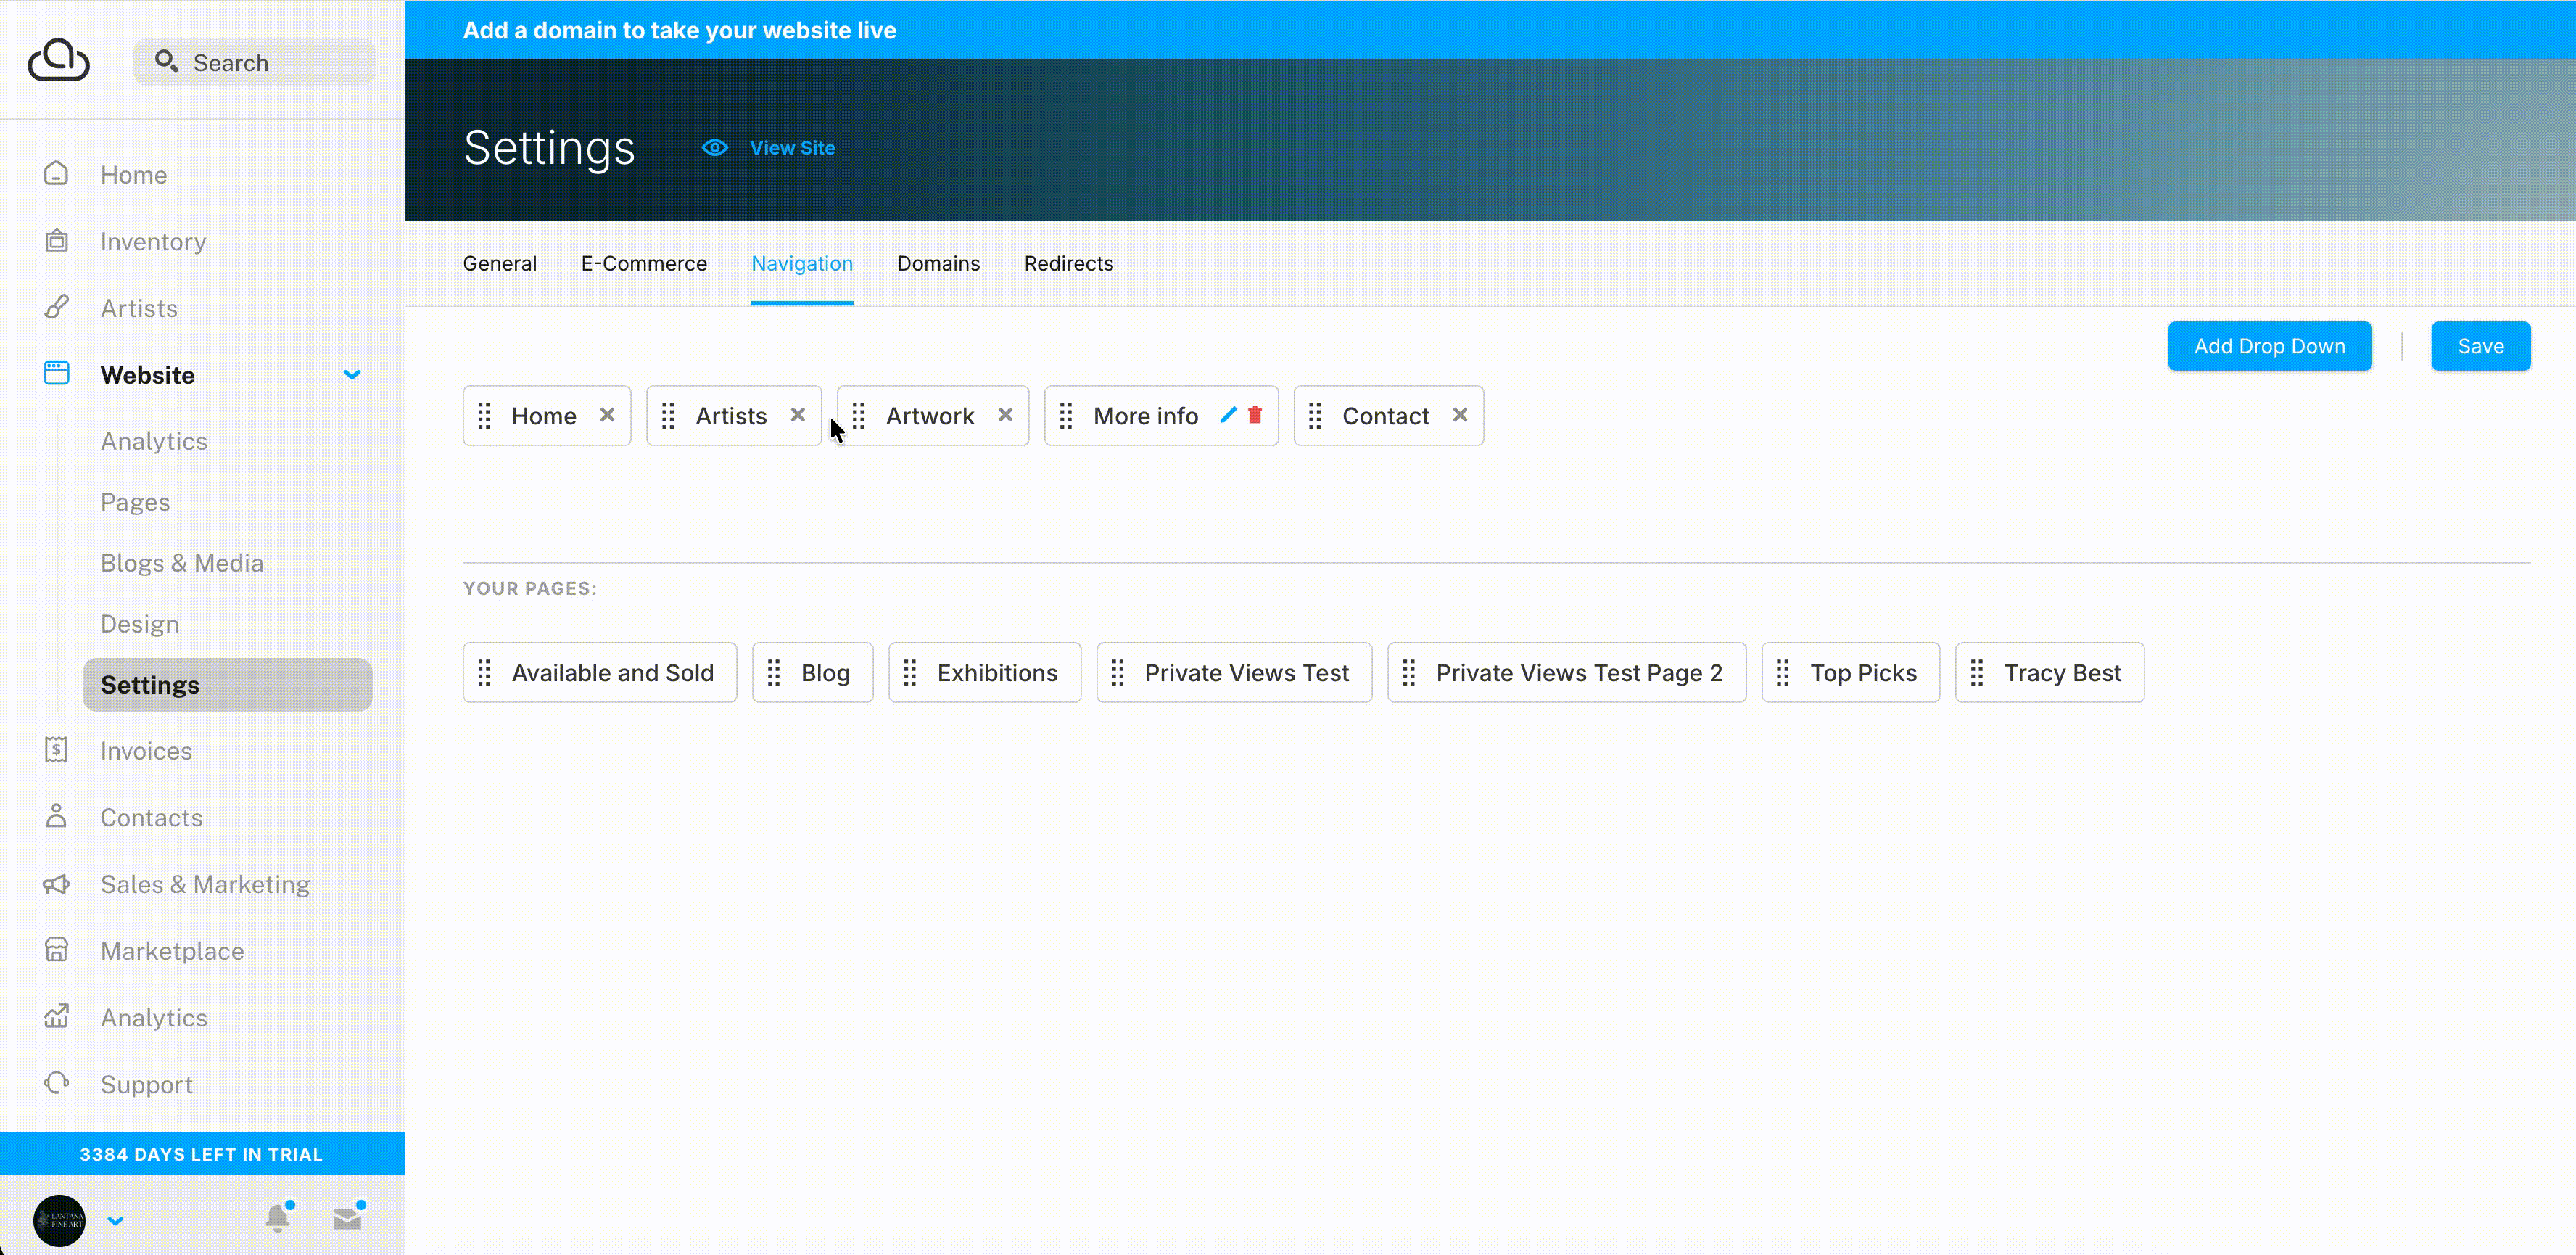
Control your website navigation in Website >> Settings >> Navigation. The pages listed at the top are in the navigation menu, and the pages below "Your Pages" are not.
Tip: Keep page titles short and limit the number of parent pages in the navigation menu. Long titles and too many parent pages take up space in the header and can push the navigation out of alignment. Use nesting to include multiple pages in your navigation.
Add and Remove Pages
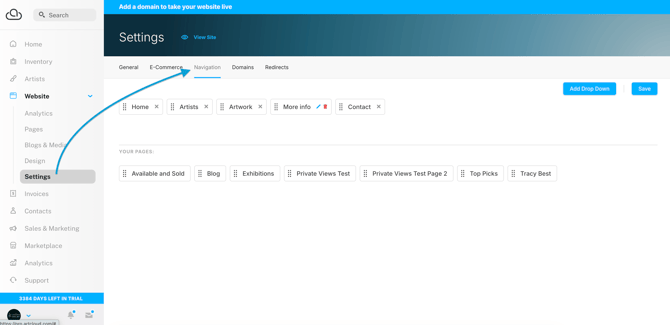
Drag a page from "Your Pages" to the top to add it to your navigation.

To remove a page, drag it back to "Your Pages" or click the X next to the page name. Click "Save" to apply changes.
You can also manage navigation in a website page's settings. On the Website tab, hover over a page title, select "Edit Settings" from the Actions dropdown, and toggle "Add page to navigation" on or off.
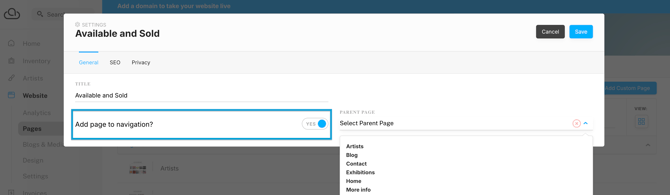
Note: Removing a page from the navigation does not delete the page. Instead, the page becomes undiscoverable unless you link it elsewhere on the website or a visitor has the direct URL.
Reorder Pages
Drag and drop pages to reorder them in the navigation. Click "Save" to apply changes.
Create Dropdown Pages
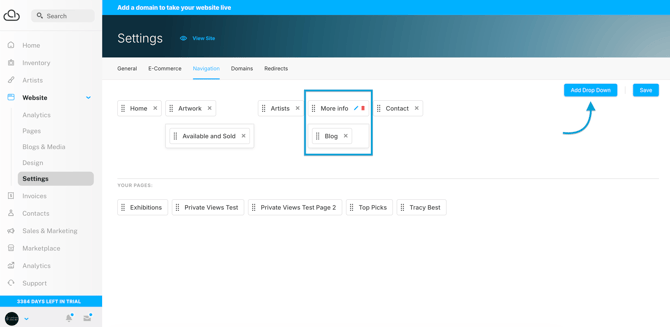
Drag one page below another to nest it. Nested pages appear in a dropdown under the parent page title. You can nest pages one level deep.

When you nest a page under an existing page, the parent page title appears twice: once as the dropdown label in the navigation and again as a link inside the dropdown. To keep the page title from showing twice, click "Add Dropdown." A dropdown is not a clickable website page. It labels and houses the nested pages. The pencil and trashcan icons indicate dropdown pages.