
Quick Jump To Guide:
How to add inventory to your website from ArtCloud Manager
> Create an Inventory Page
> Add an inventory block to a Custom Page
> Add an inventory block to the Artist Profile Page Template
> Add an inventory block to the Exhibition Detail Page Template
How do I control the type of inventory displaying on my page?
ArtCloud Manager and ArtCloud's Website Builder are linked together to make displaying your artwork and inventory even easier! You can add inventory to your website that has already been added to ArtCloud Manager without double entry.
How to add inventory to your website from ArtCloud Manager
Inventory populates on your website through the use of Inventory Blocks. Inventory Blocks live in many places in the ArtCloud Website Builder, but the most common are on the Inventory page type, Artist Profile Page Template, and Exhibition Detail Page Template. We'll walk through these options in this article.
Create an Inventory page
ArtCloud's Website Builder offers different page types when you create a new web page. You can choose an Inventory page type that automatically has an Inventory block on the page itself. Create a page that already has an Inventory Block added to it by following the steps to create a new page, and click the Inventory option from the Select Page Type dropdown.
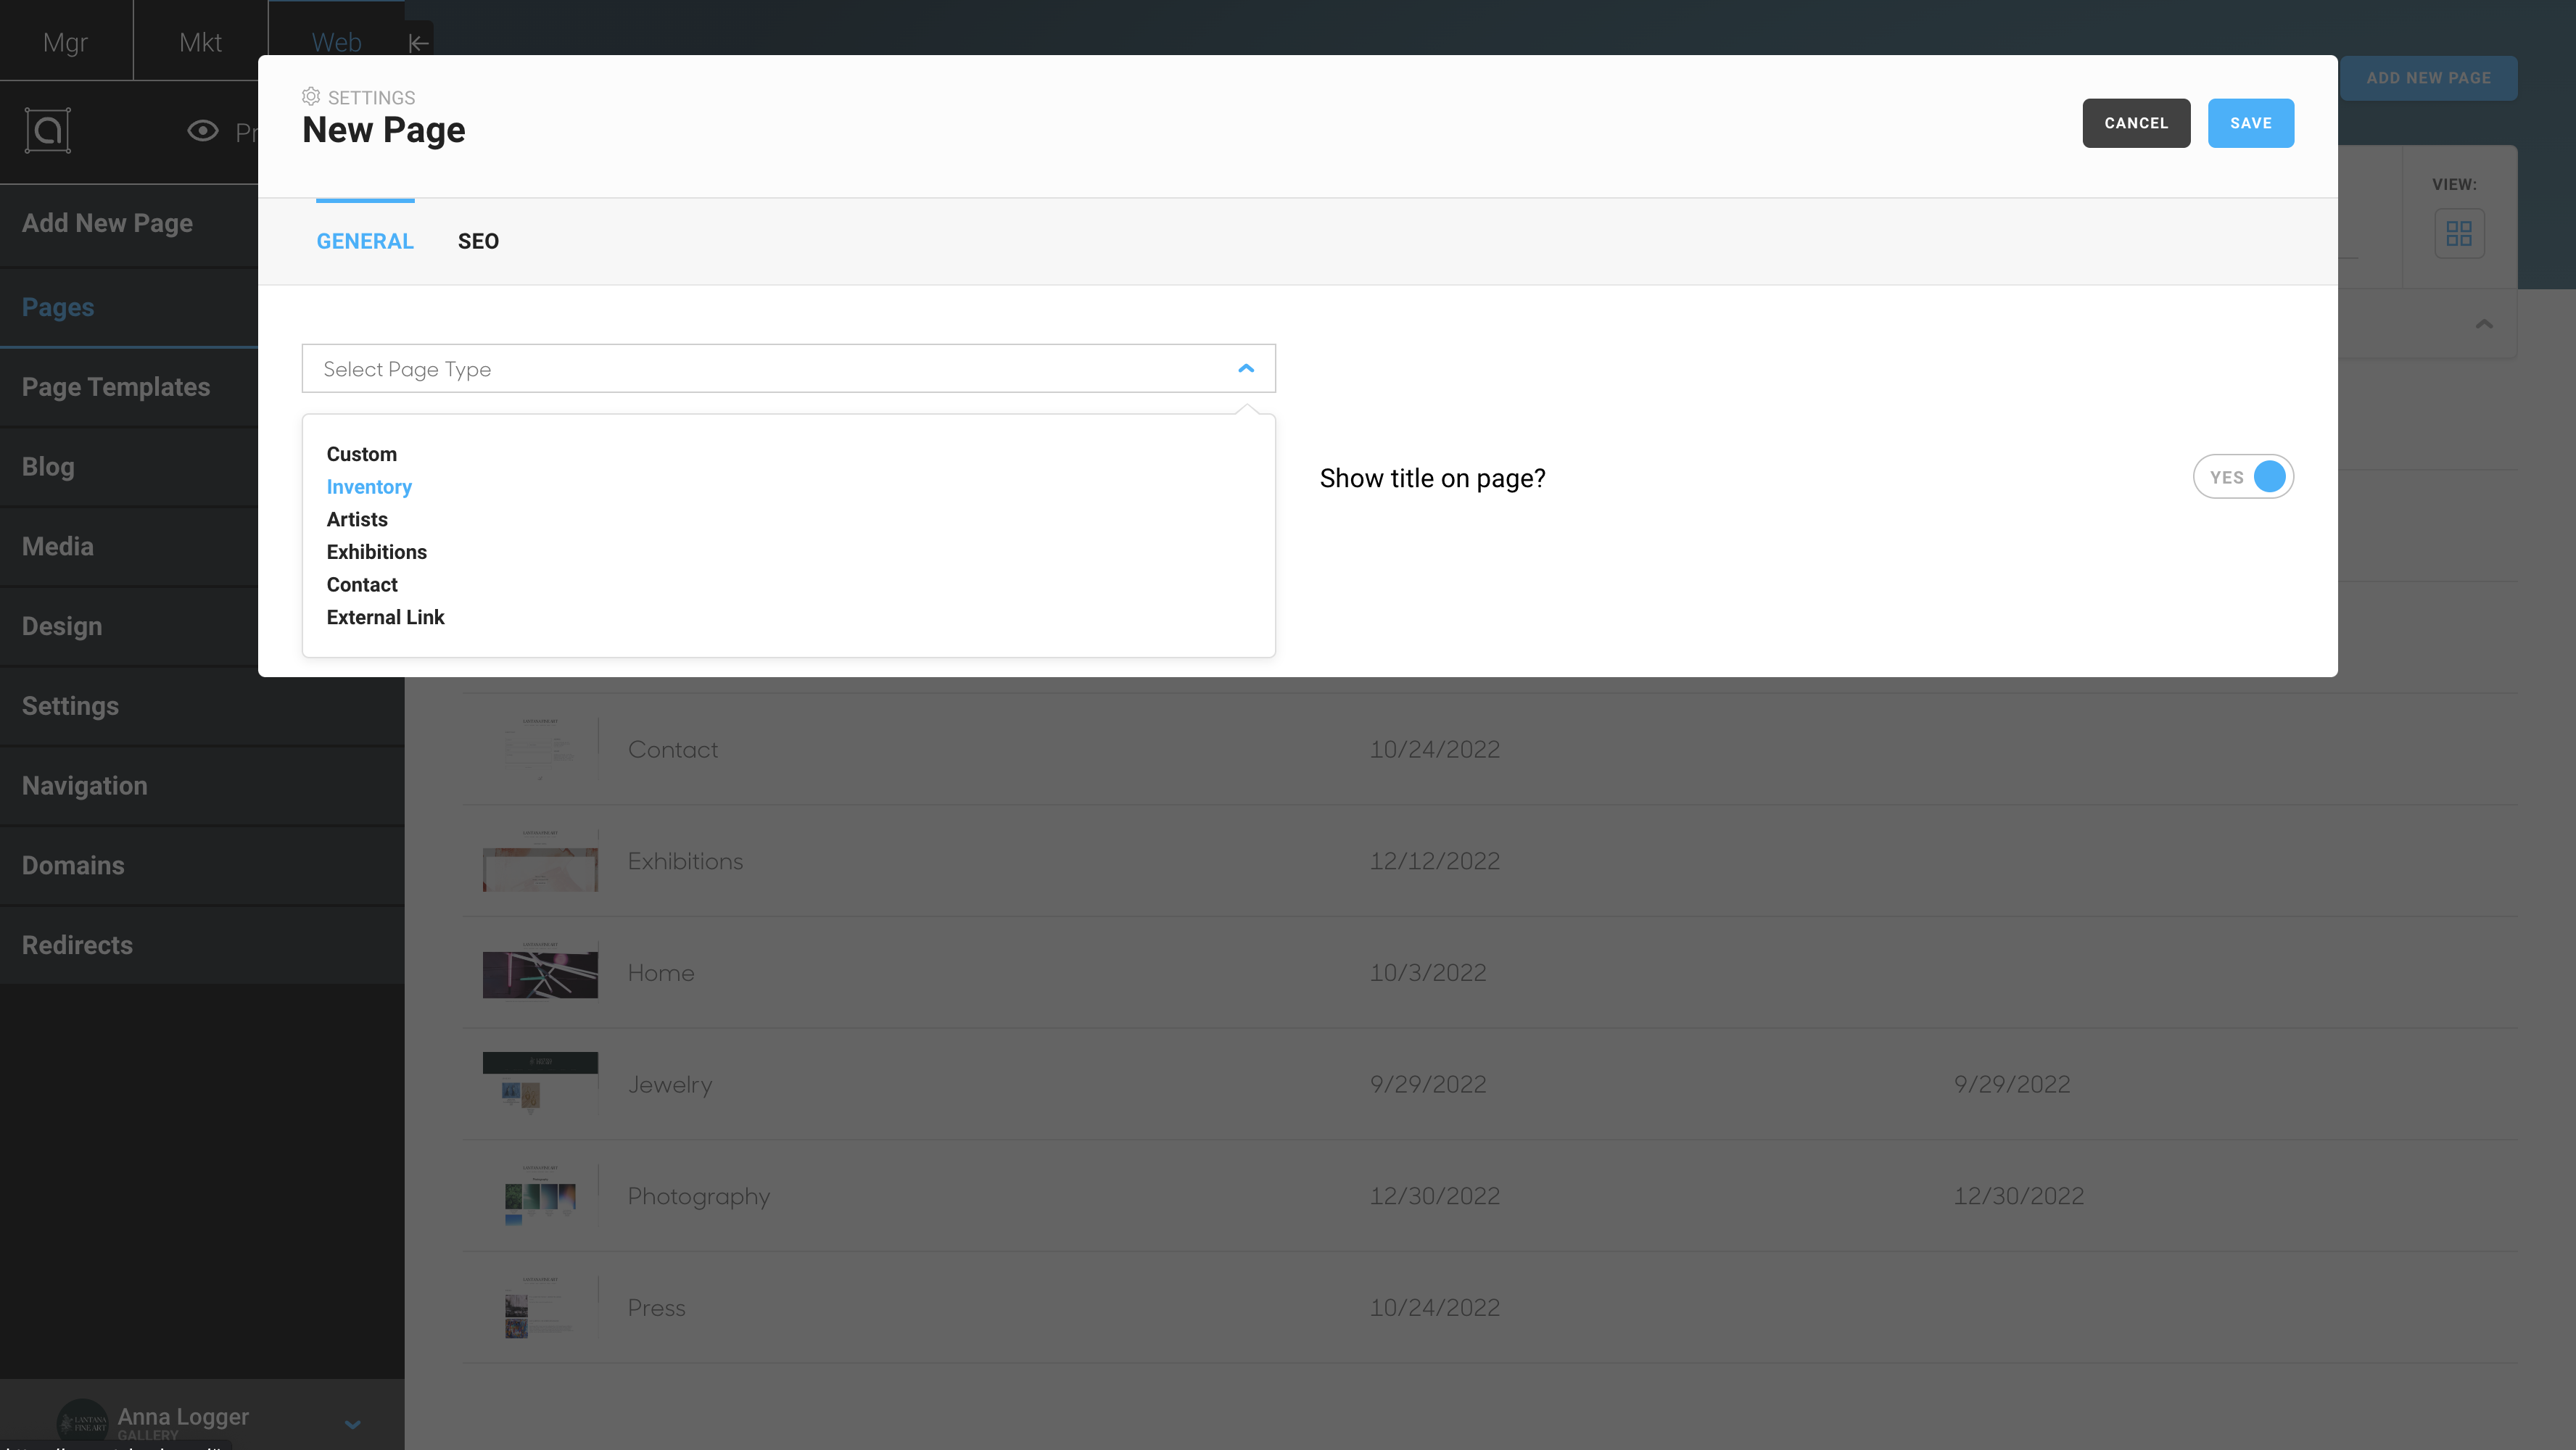
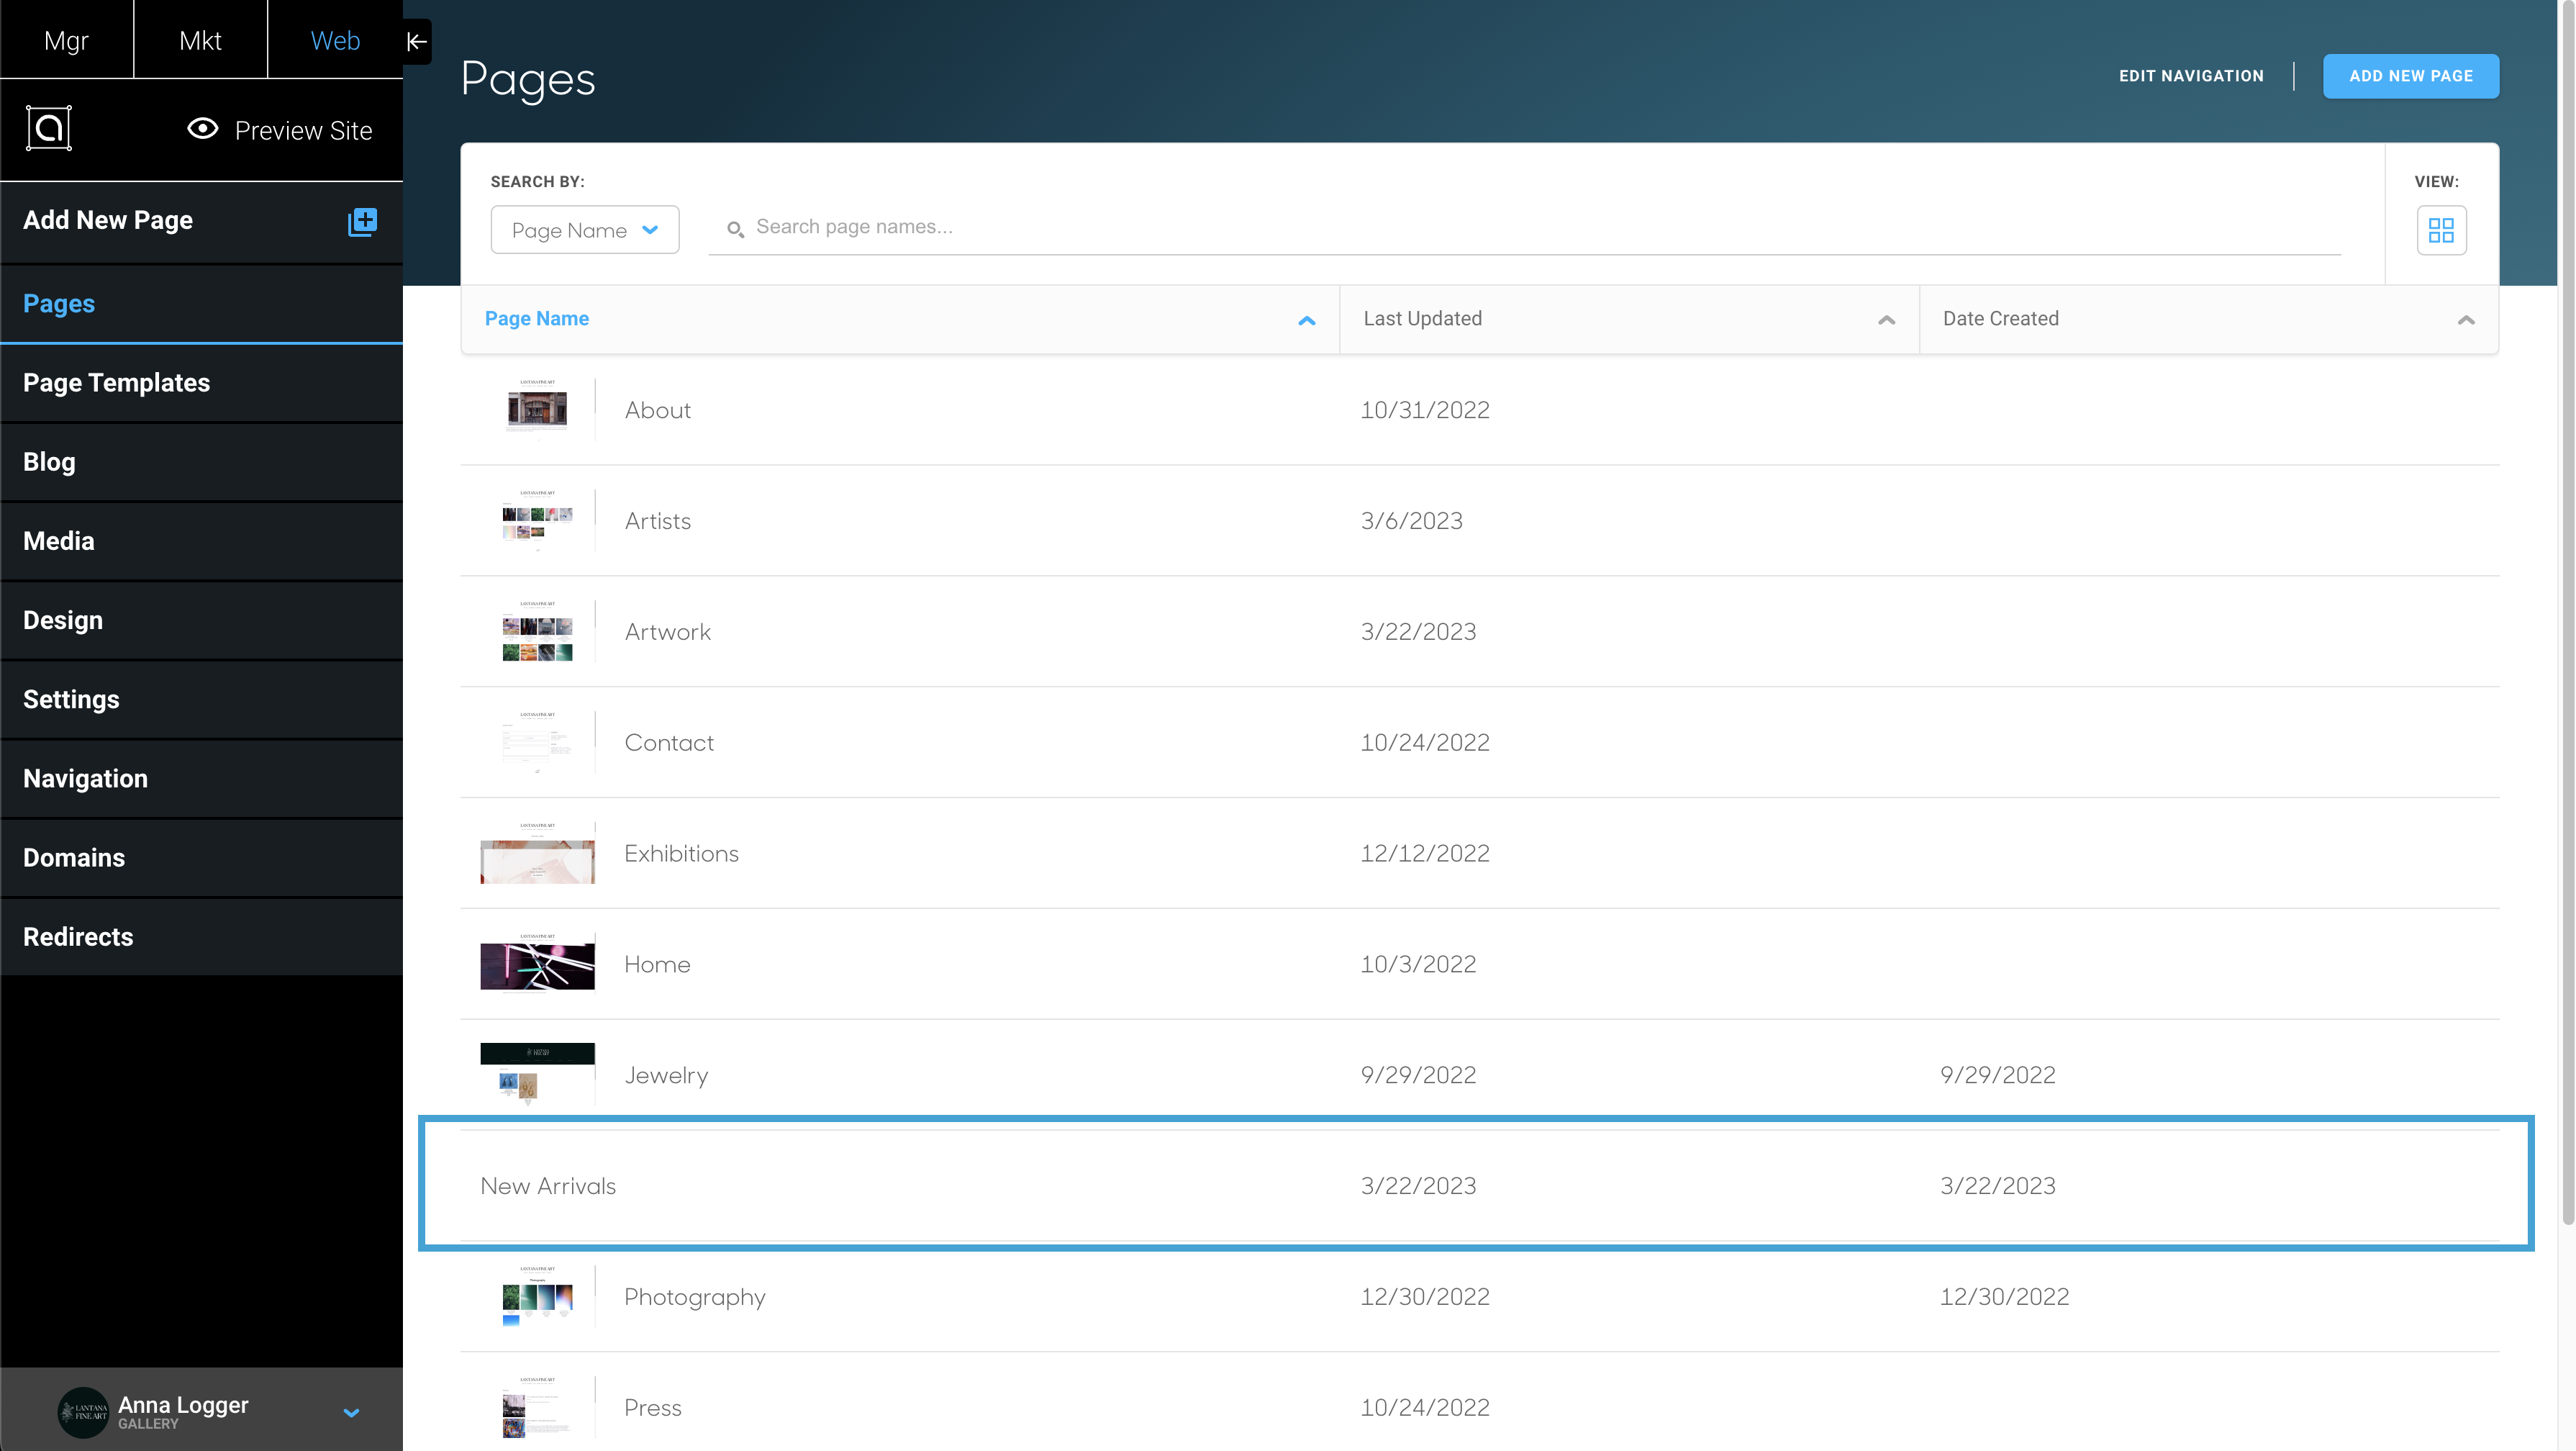
Be sure to name your page and decide if you would like it to appear in your navigation. In this case, I named our new page New Arrivals, though you can name it whatever you'd like. If we view the Pages dashboard, you'll see our New Arrivals page created and placed in alphabetical order. This page with inventory items has instantly been created.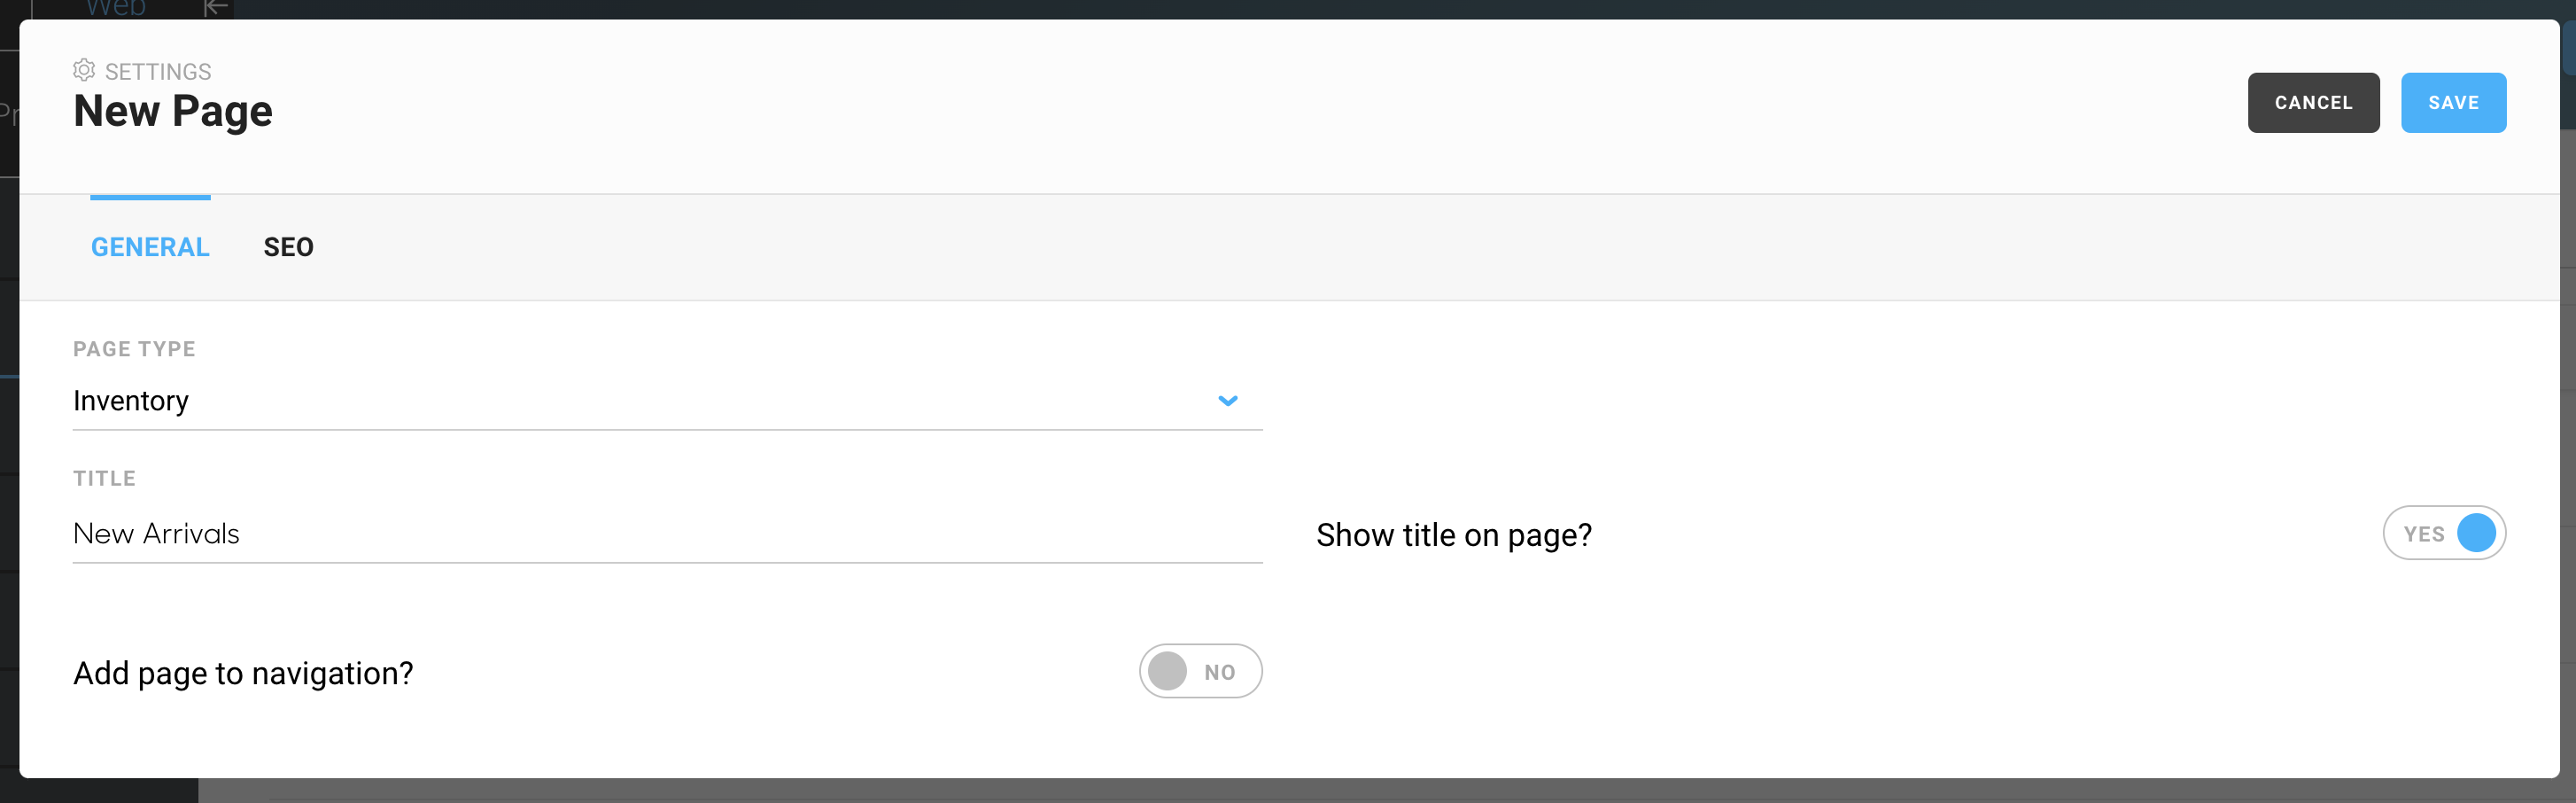
-gif.gif)
Add an inventory block to a Custom Page
Once you've already created your Custom Page, you can easily add an Inventory block to this page from under the Content tab on this page within the Website Builder. We'll be adding inventory to the bottom of our Home page in this example.
Navigate to the page you want to add inventory to and click on the Content tab:
-gif.gif)
Next, drag an Inventory Block into your page.
-gif.gif)
Add an inventory block to the Artist Profile Page Template
Artist Profile Page Templates are only available in Gallery account types for the management of their Artists. Artist account types can add inventory via the Inventory Page type or a Custom Page.
On default, you will have an inventory block already placed on your Artist Profile Page Template. However, if you've accidentally deleted this or you'd like to add another inventory block to display sold works on your Artist's pages, you can perform this under the Content tab.
Navigate to your Artist Profile Page Template and click on the Content tab:
-gif.gif)
Next, drag an Inventory Block into your template. On the Artist Profile Page Template, this is labeled as 'Artist Inventory'. See .gif example below.
-gif.gif)
Add an inventory block to the Exhibition Detail Page Template
On default, you will have an inventory block already placed on your Exhibition Detail Page Template. However, if you've accidentally deleted this or you'd like to add another inventory block to separate sold works on your Exhibition pages, you can perform this under the Content tab.
Navigate to your Exhibition Detail Page Template and click on the Content tab:
-gif.gif)
Next, drag an Inventory Block into your template. On the Exhibition Detail Page Template, this is labeled as 'Exhibition Inventory'. See .gif example below.
-gif.gif)
Inventory blocks within your Website appear based on the settings made on the particular inventory block. ArtCloud uses statuses to label inventory: Active, Inactive, and Sold. Learn more about these statuses here.