- Knowledge Base
- ArtCloud Website Builder
- Exhibition Block Configuration
-
Getting Started with ArtCloud
-
ArtCloud for Artists
-
ArtCloud Manager - Dashboard
-
ArtCloud Manager - Inventory
-
ArtCloud Manager - Artists
-
ArtCloud Manager - Exhibition
-
ArtCloud Manager - Invoices
-
ArtCloud Manager - Logistics & Purchase Orders
-
ArtCloud Manager - Marketing/Sales
-
ArtCloud Manager - Contacts
-
ArtCloud Manager - Analytics
-
Account Settings
-
The ArtCloud Marketplace
-
ArtCloud Website Builder
- Sitebuilder 3.0
- Artist Block Configuration
- Inventory Block Configuration
- Exhibition Block Configuration
- Blocks / Snippets
- Blocks / Snippets - Pro+
- Pages
- Page Templates
- Page Templates - Artist Profile
- Page Templates - Inventory Detail
- Page Templates - Exhibition Detail
- Page Templates - Header
- Page Templates - Footer
- Blog
- Media
- Design
- Settings
- Navigation
- Domains
-
ArtCloud Website Management
-
Privacy and Terms
How to tag & display Exhibitions by tags on your Website
Display and organize your Exhibitions by tags for easy customization.
Quick Jump To Guide:
Adding tags to an Exhibition
Displaying Exhibitions by tag on your Website
If you're looking for a bit more control over how you'd like to display your Exhibitions on your website, you can organize your Exhibition shows by tags. Similar to displaying artists by tag, you can organize your Exhibition block beyond the options in the Exhibitions to Pull field: All, Current and Upcoming, Past, Present, or Future.
Once you've created your base exhibition and added it to your website, you'll now be able to organize how you'd like your show to display on your Website.
Adding tags to an Exhibition
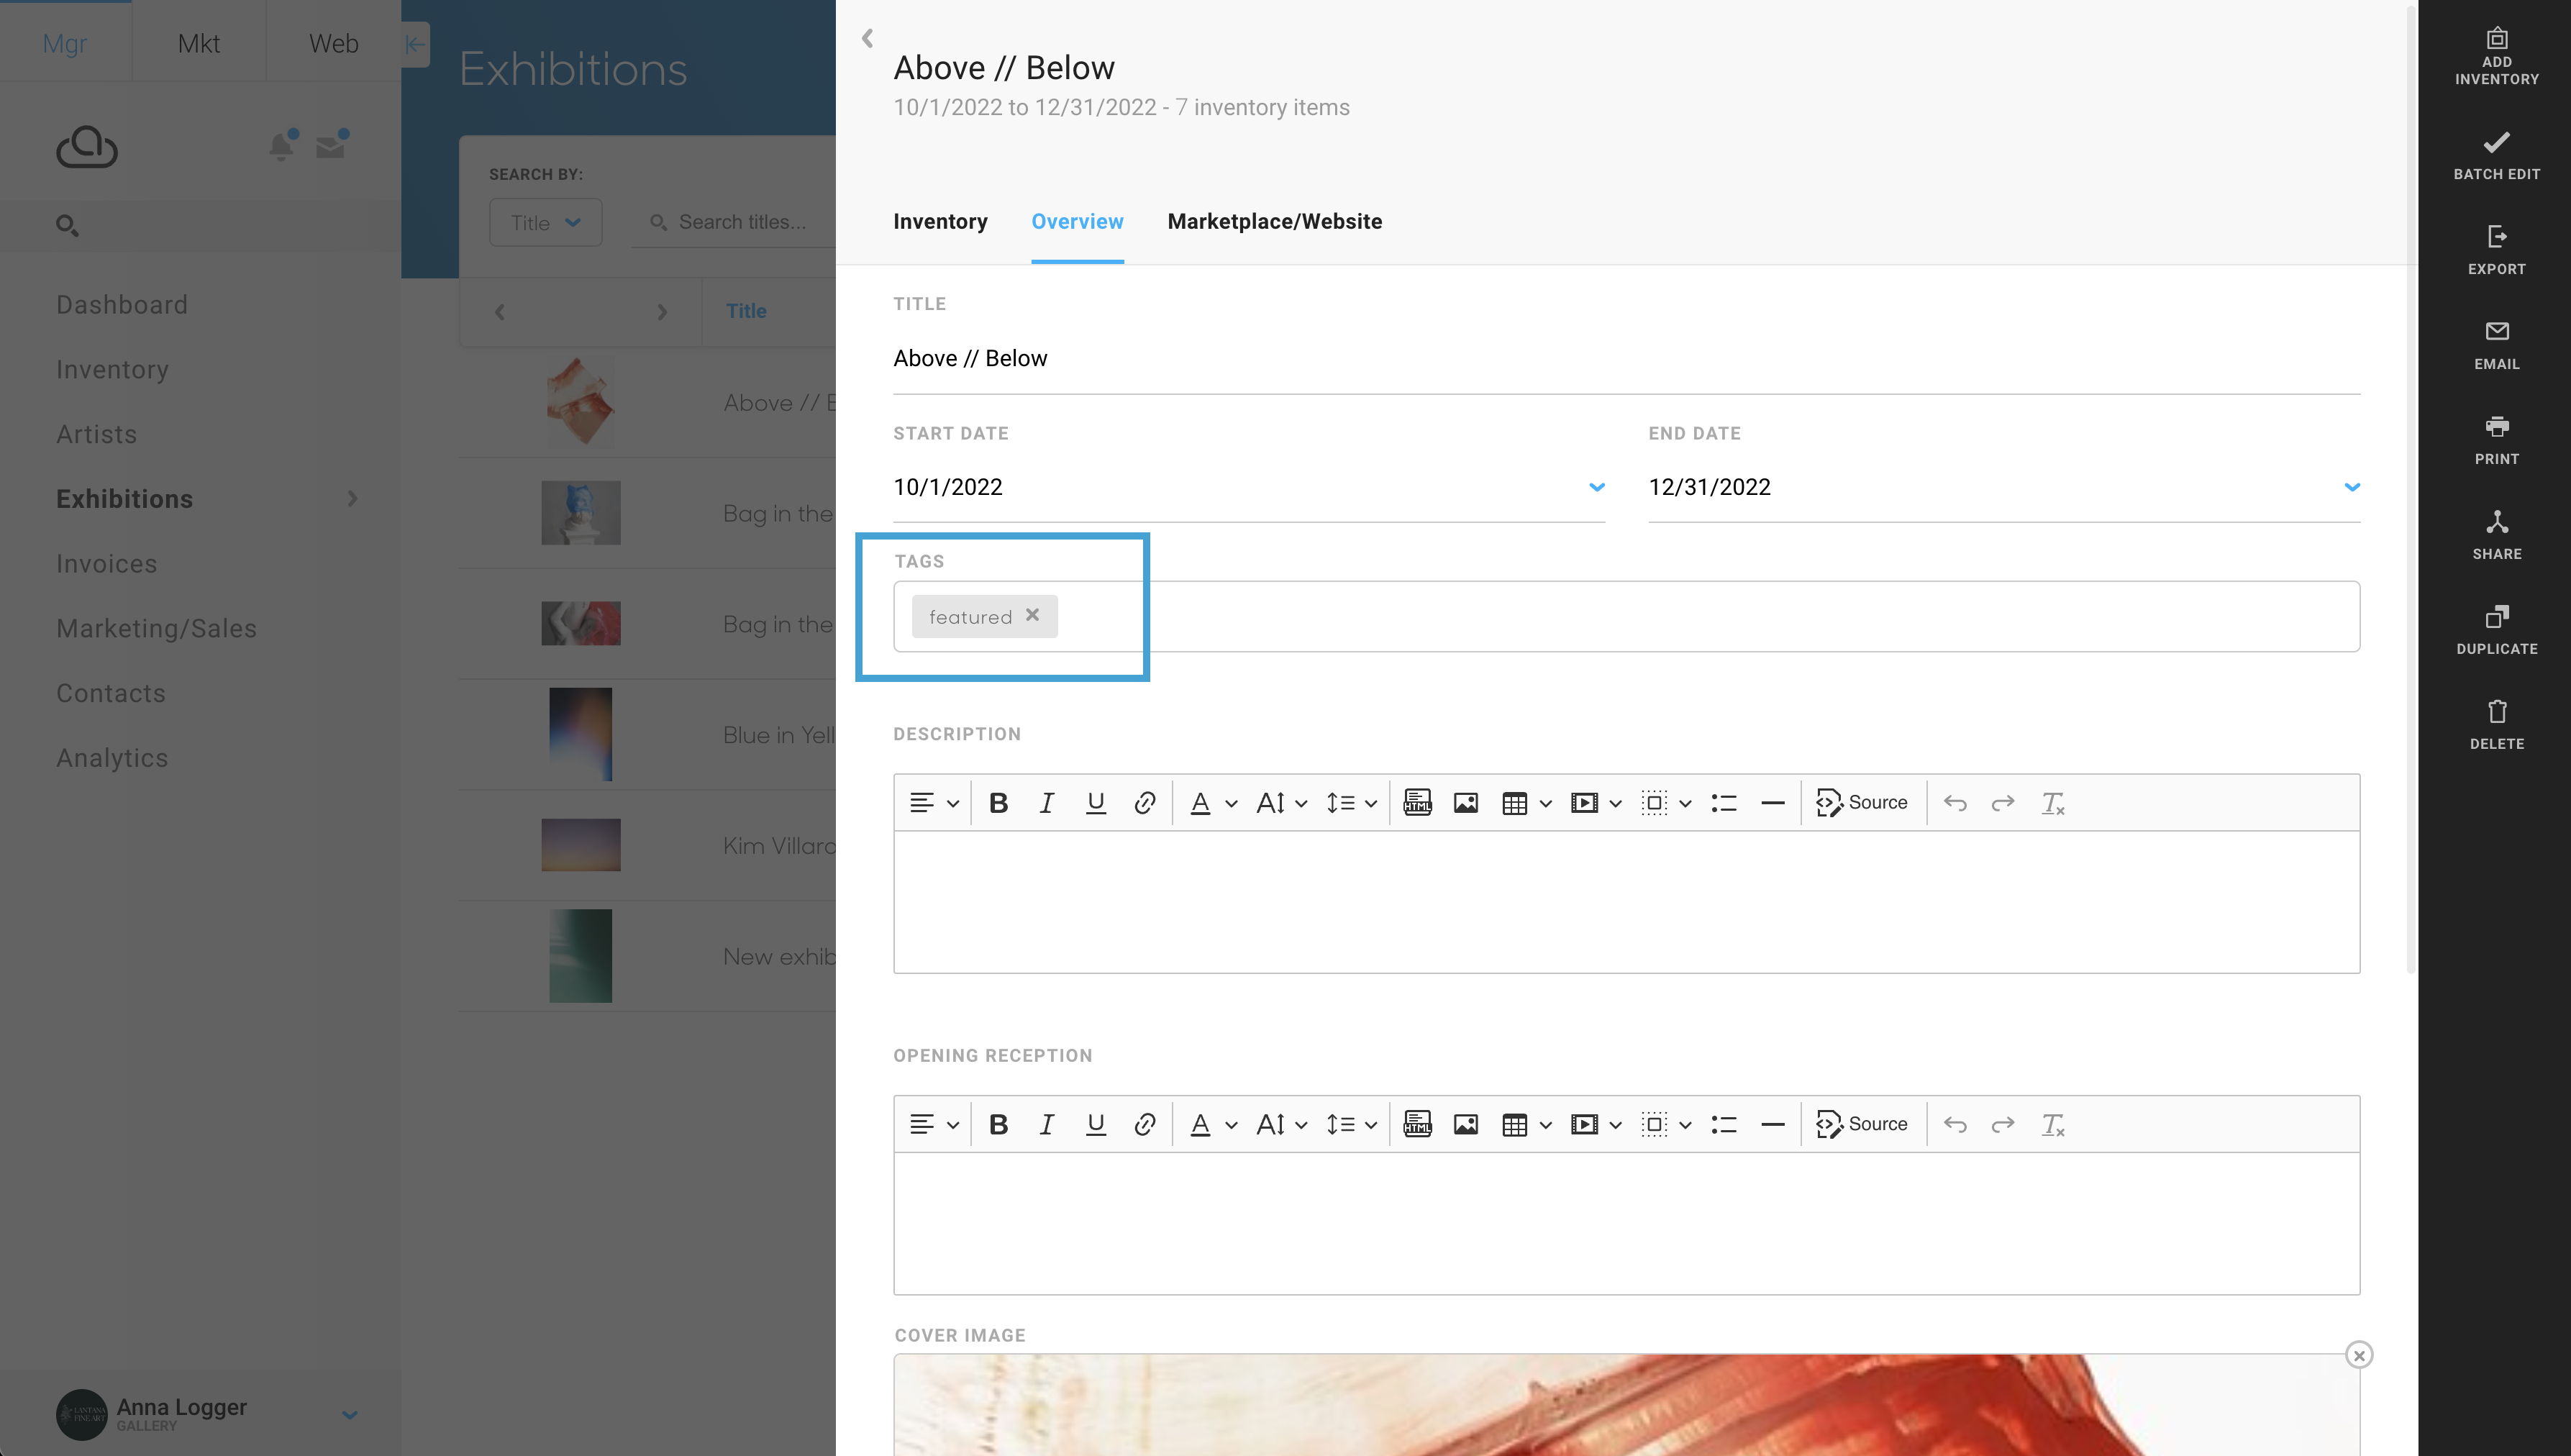
You can add tags to your Exhibition to when creating or editing your Exhibition. You'll want to navigate to the Exhibition tab of your Manager, either create a new show or edit an existing show. On the Overview tab of your Exhibition is where you'll be able to add your tag. In the example below, we've added the featured tag for this Exhibition:

Pro Tip: You can add multiple tags to an Exhibition. These tags will allow this show to appear on your site wherever you use those tags on the Exhibition blocks. This will allow you to display an Exhibition twice on your Exhibition page.
Displaying Exhibitions by tag on your Website
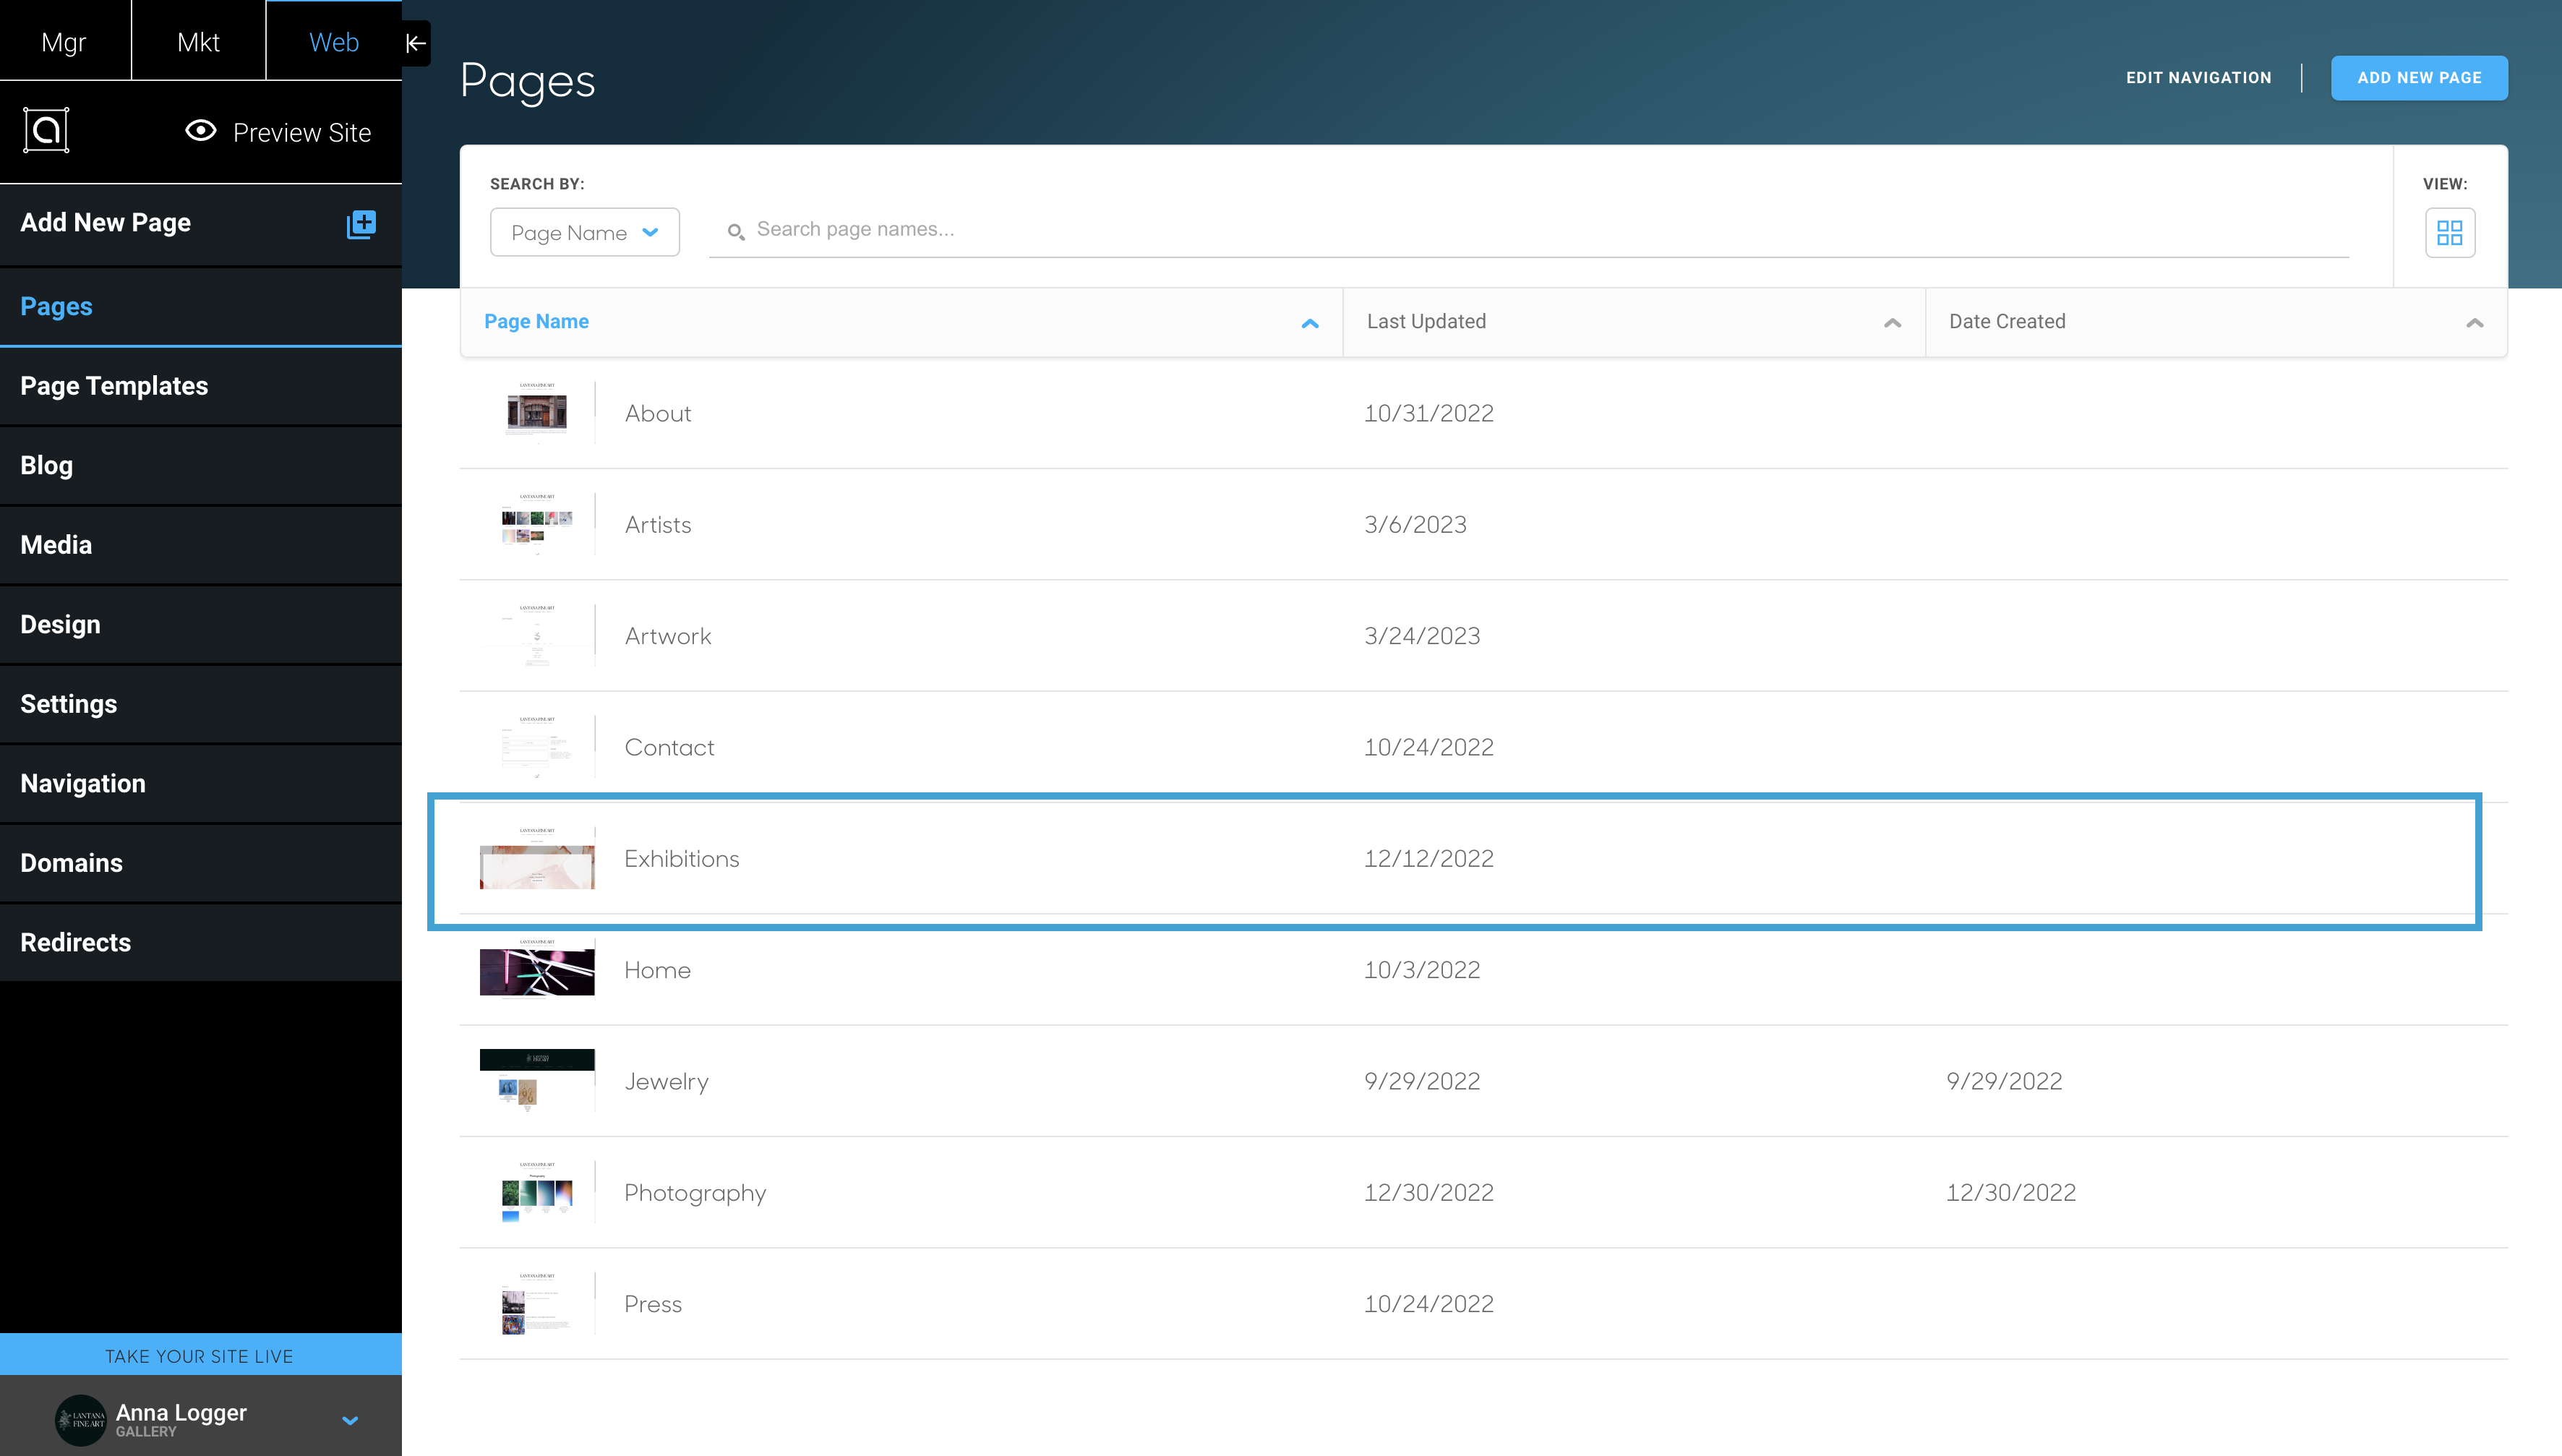
After adding a tag to your Exhibition, you'll want to apply this tag to the specific Exhibition block on your website. Navigate to the page where your Exhibitions populate within your Website Builder. Once you click on this page title, it will automatically open the page for you to edit:

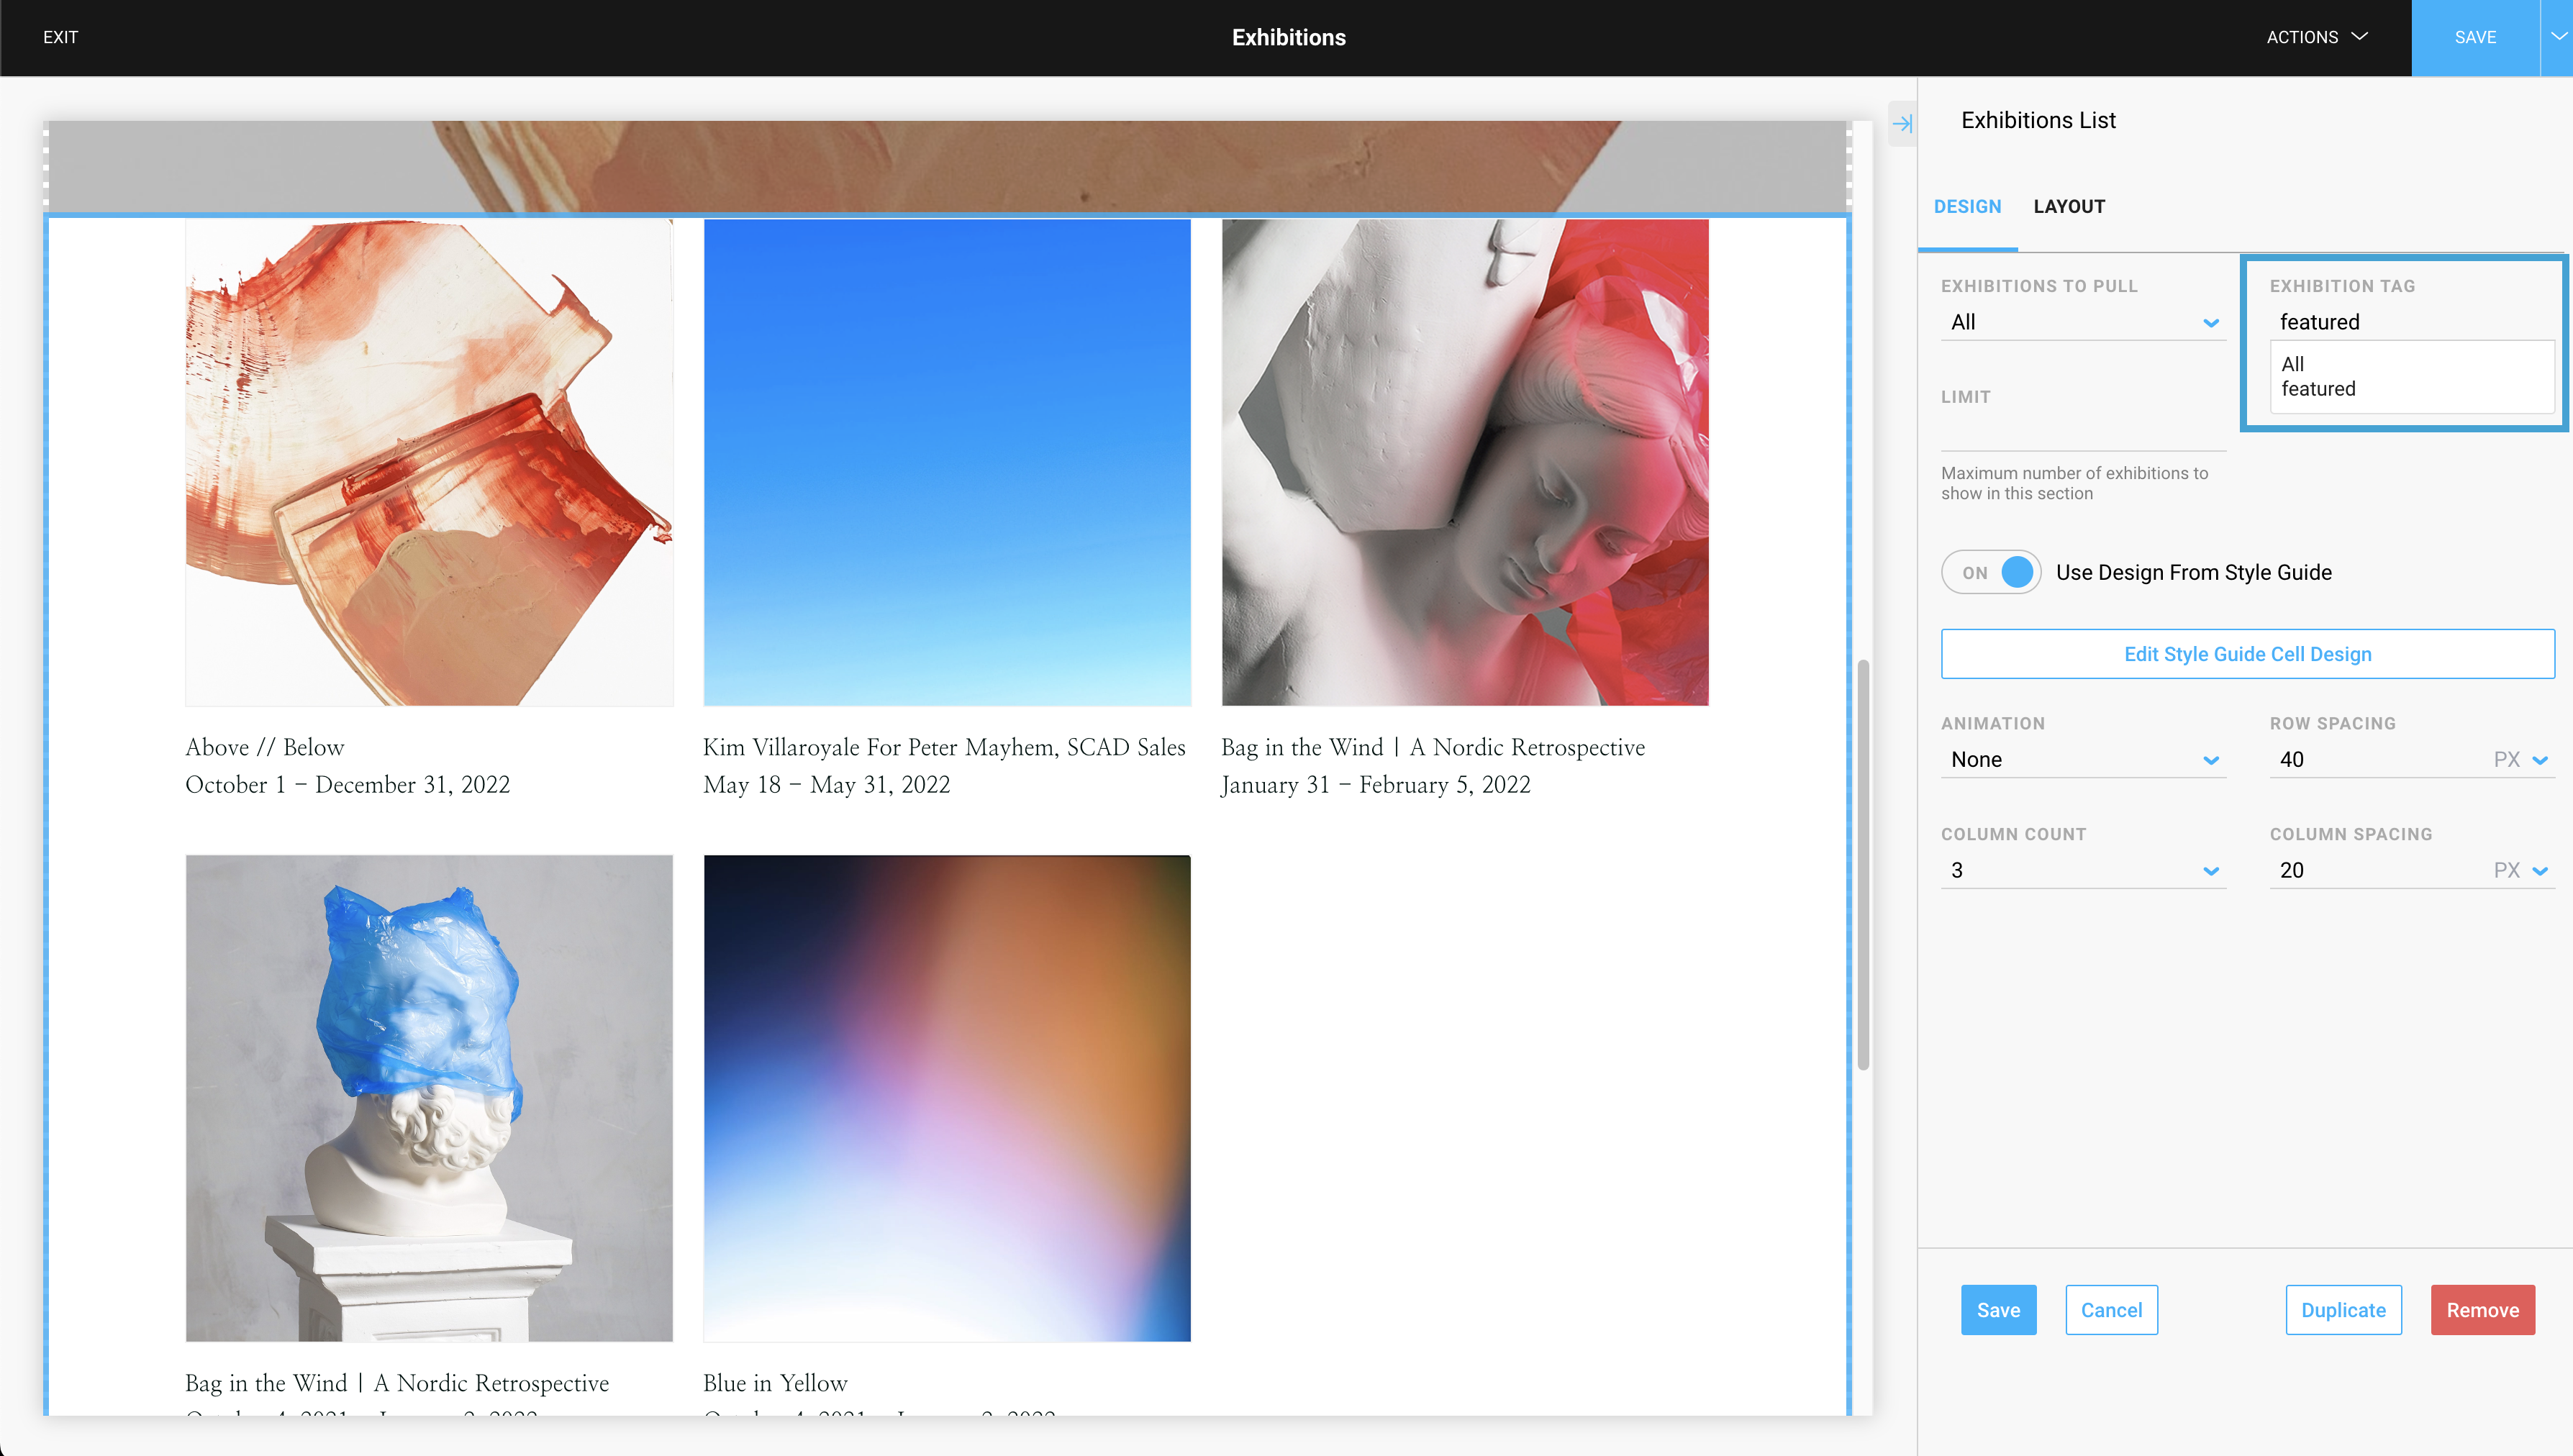
Once on this page, click on your Exhibition block. On the Design tab of your Exhibition block, you'll see a space for Exhibition Tag. Here's where we'll add in our featured tag.

Please note: The platform will honor the Exhibitions to Pull field options (Current & Upcoming, Present, Future, Past, etc...) based on the show's dates or date range. If you want complete control over which shows to display in your Exhibition block, we suggest setting the Exhibitions to Pull field as ALL. This will inform the platform to disregard any specific date range and to use the Exhibition tags to display data instead.
